How To Launch Channels On Smart TV Platforms

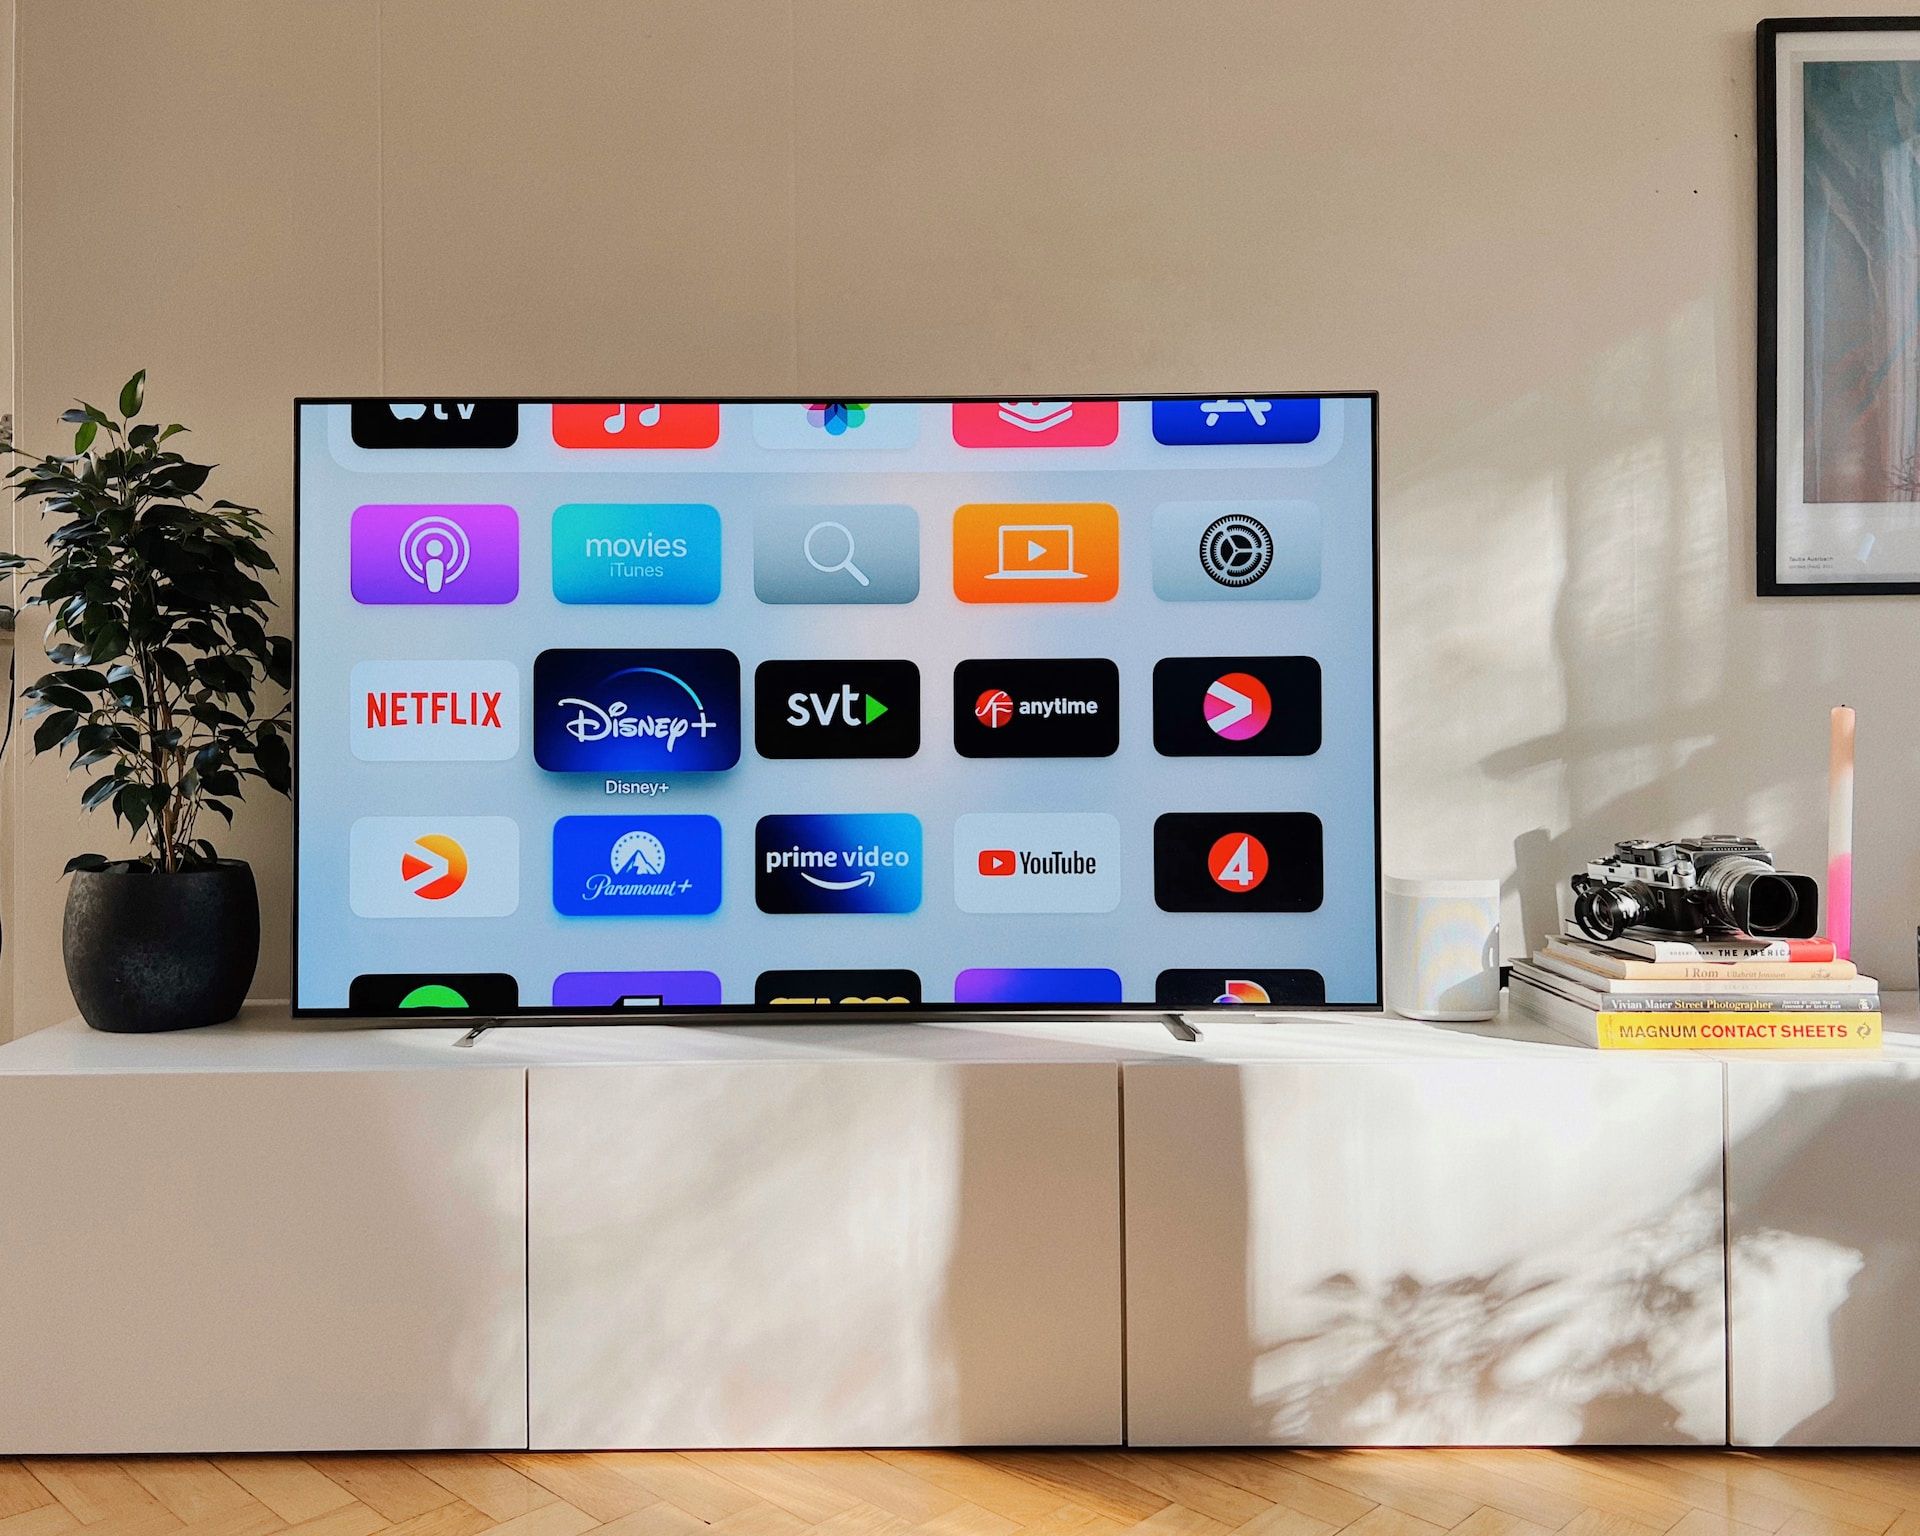
Podcasts are rapidly overtaking broadcast and/or cable TV. After YouTube and Rumble, you might need to launch your channel as a perma-bookmark on the devices themselves. That means Roku, Fire TV, Apple TV, Samsung, LG, and more. It's daunting.
Server-Side Video Broadcasting Basics
Setting up the backend video farm for live or on-demand broadcast is out of scope for this article, and it assumes from the beginning you have that set up.
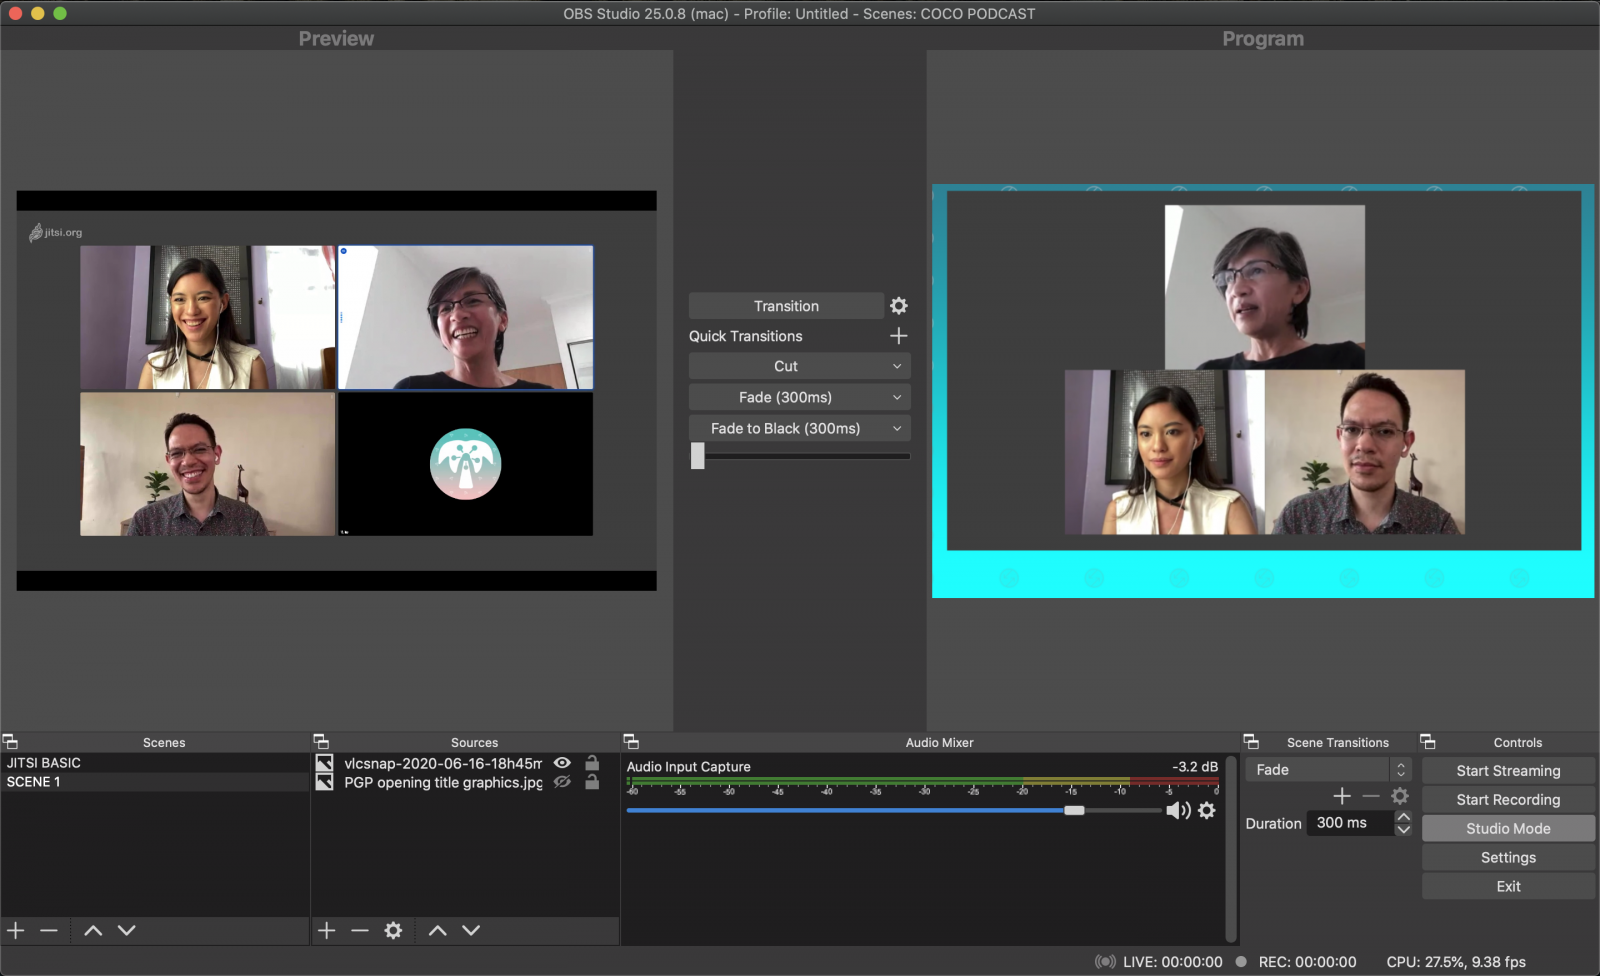
The most common way might be using OBS Studio (https://obsproject.com/) to a Wowza streaming server (https://www.wowza.com/products/streaming-engine), AWS Elemental MediaLive, or Akamai Adaptive Media Delivery. These chunk the content using HTTP Live Streaming (HLS), Dynamic Adaptive Streaming over HTTP (DASH), or Real-Time Messaging Protocol (RTMP).
If you wanted to host your own infrastructure, you're looking at:
- Nginx with its RTMP module (HLS and DASH, covered on this site);
- Red5 Pro (RTMP, HLS, and WebRTC, https://github.com/Red5/red5-server)
- SRS Simple Real-time Streaming Server (RTMP, HLS, and DASH, https://github.com/ossrs/srs);
- Ant Media Server (RTMP, WebRTC, HLS, and DASH, https://github.com/ant-media/Ant-Media-Server).
For deploying large scale Nginx video servers via Docker/Kubernetes, see: https://devilslane.com/10000-hls-rtmp-live-video-streaming-servers-with-docker-nginx/
Roku: BrightScript + SceneGraph
Sign up for a Roku Developer account at https://developer.roku.com/. This account is necessary to access the tools and resources you need to develop your channel. The Roku Software Development Kit (SDK) provides the tools, documentation, and samples needed to develop a channel.
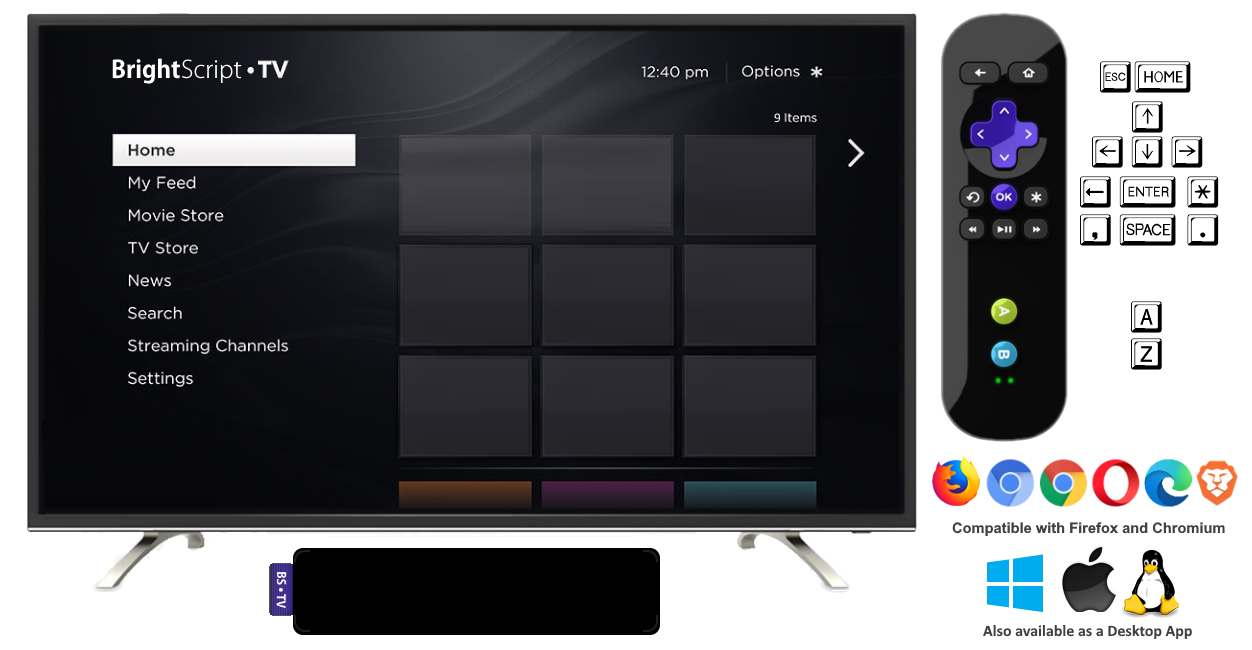
Roku channels are primarily built using BrightScript, a scripting language specific to Roku, and SceneGraph, an XML-based language for creating user interfaces. You test your channel on a Roku device or the Roku simulator, which is included in the SDK. Once your channel is complete and thoroughly tested, you package it into a ZIP file. The SDK provides a packaging utility that signs your channel and creates it.
You upload it in your account, and once your channel has been approved, it 's published on the Roku Channel Store.
App Layout
myfolder/
-- manifest
-- main.brs
-- components/
    -- HomeScene.xml
-- images/manifest:
title=My Roku Channel
subtitle=Example Skeleton App
version=1.0.0
major_version=1
minor_version=0
build_version=0
mm_icon_focus_hd=pkg:/images/icon_focus_hd.png
mm_icon_side_hd=pkg:/images/icon_side_hd.png
splash_screen_hd=pkg:/images/splash_screen_hd.png
vendor_name=YourName
language=en
main.brs
sub Main()
    screen = CreateObject("roSGScreen")
    m.port = CreateObject("roMessagePort")
    screen.setMessagePort(m.port)

    scene = screen.CreateScene("HomeScene")
    screen.show()

    while(true)
        msg = wait(0, m.port)
        msgType = type(msg)

        if msgType = "roSGScreenEvent" then
            if msg.isScreenClosed() then
                exit while
            end if
        end if
    end while
end sub
components/HomeScreen.xml
<?xml version="1.0" encoding="utf-8" ?>
<component name="HomeScene" extends="Scene">
    <children>
        <Label
            id="helloWorldLabel"
            text="Hello, World!"
            font="font:LargeBoldSystemFont"
            color="0xEBEBEBFF"
            translation="[100,100]" />
    </children>
</component>
Connecting To A Video Stream
In MainScene.xml
<?xml version="1.0" encoding="utf-8" ?>
<scene xmlns="http://www.roku.com" onCreate="init()">
    <video id="videoPlayer" width="1280" height="720" />
</scene>
In MainScene.brs
sub init()
    liveStreamUrl = "LIVE_STREAM_URL"
    videoPlayer = m.top.findNode("videoPlayer")
    videoPlayer.content = createObject("RoSGNode", "ContentNode")
    videoPlayer.content.url = liveStreamUrl
    videoPlayer.control = "play"
end sub
Roku has an OpenHAB binding: https://www.openhab.org/addons/bindings/roku/
Sony TV / Amazon TV: Android (Java/Kotlin)
Download and install Android Studio, the official Integrated Development Environment (IDE) for Android development, from https://developer.android.com/studio. Their official tutorial is here: https://developer.amazon.com/docs/fire-tv/creating-media-streaming-app.html
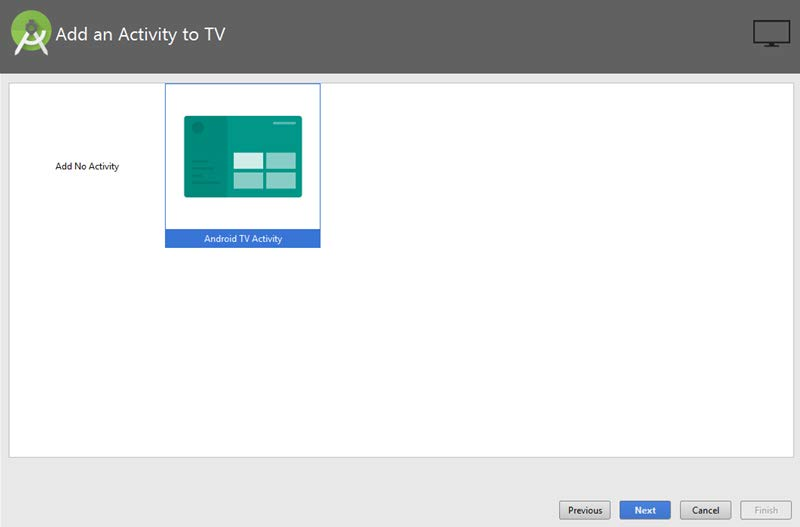
You'll need to set up a Fire TV emulator in Android Studio: https://developer.amazon.com/docs/fire-tv/setting-up-the-fire-tv-emulator.html. Alternatively, you can use a physical Fire TV device for testing.
App Layout
In build.gradle, add the Leanback library:
dependencies {
    implementation 'androidx.leanback:leanback:1.0.0'
    implementation 'androidx.leanback:leanback-preference:1.0.0'
}
Inside AndroidManifest.xml:
android:banner="@drawable/app_banner"
android:theme="@style/Theme.Leanback"
activity_main.xml
<?xml version="1.0" encoding="utf-8"?>
<androidx.constraintlayout.widget.ConstraintLayout xmlns:android="http://schemas.android.com/apk/res/android"
    xmlns:app="http://schemas.android.com/apk/res-auto"
    xmlns:tools="http://schemas.android.com/tools"
    android:layout_width="match_parent"
    android:layout_height="match_parent"
    tools:context=".MainActivity">

    <TextView
        android:id="@+id/helloWorldLabel"
        android:layout_width="wrap_content"
        android:layout_height="wrap_content"
        android:text="Hello, World!"
        android:textSize="24sp"
        android:textColor="@android:color/white"
        app:layout_constraintBottom_toBottomOf="parent"
        app:layout_constraintEnd_toEndOf="parent"
        app:layout_constraintStart_toStartOf="parent"
        app:layout_constraintTop_toTopOf="parent" />

</androidx.constraintlayout.widget.ConstraintLayout>
Connecting To A Video Stream
In MainActivity.java
import android.net.Uri;
import android.os.Bundle;
import android.widget.VideoView;
import androidx.appcompat.app.AppCompatActivity;

public class MainActivity extends AppCompatActivity {

    @Override
    protected void onCreate(Bundle savedInstanceState) {
        super.onCreate(savedInstanceState);
        setContentView(R.layout.activity_main);

        VideoView videoView = findViewById(R.id.videoView);
        String liveStreamUrl = "LIVE_STREAM_URL";
        videoView.setVideoURI(Uri.parse(liveStreamUrl));
        videoView.start();
    }
}
In activity_main.xml
<?xml version="1.0" encoding="utf-8"?>
<androidx.constraintlayout.widget.ConstraintLayout xmlns:android="http://schemas.android.com/apk/res/android"
    xmlns:app="http://schemas.android.com/apk/res-auto"
    xmlns:tools="http://schemas.android.com/tools"
    android:layout_width="match_parent"
    android:layout_height="match_parent"
    tools:context=".MainActivity">

    <VideoView
        android:id="@+id/videoView"
        android:layout_width="match_parent"
        android:layout_height="match_parent"
        app:layout_constraintBottom_toBottomOf="parent"
        app:layout_constraintEnd_toEndOf="parent"
        app:layout_constraintStart_toStartOf="parent"
        app:layout_constraintTop_toTopOf="parent" />

</androidx.constraintlayout.widget.ConstraintLayout>
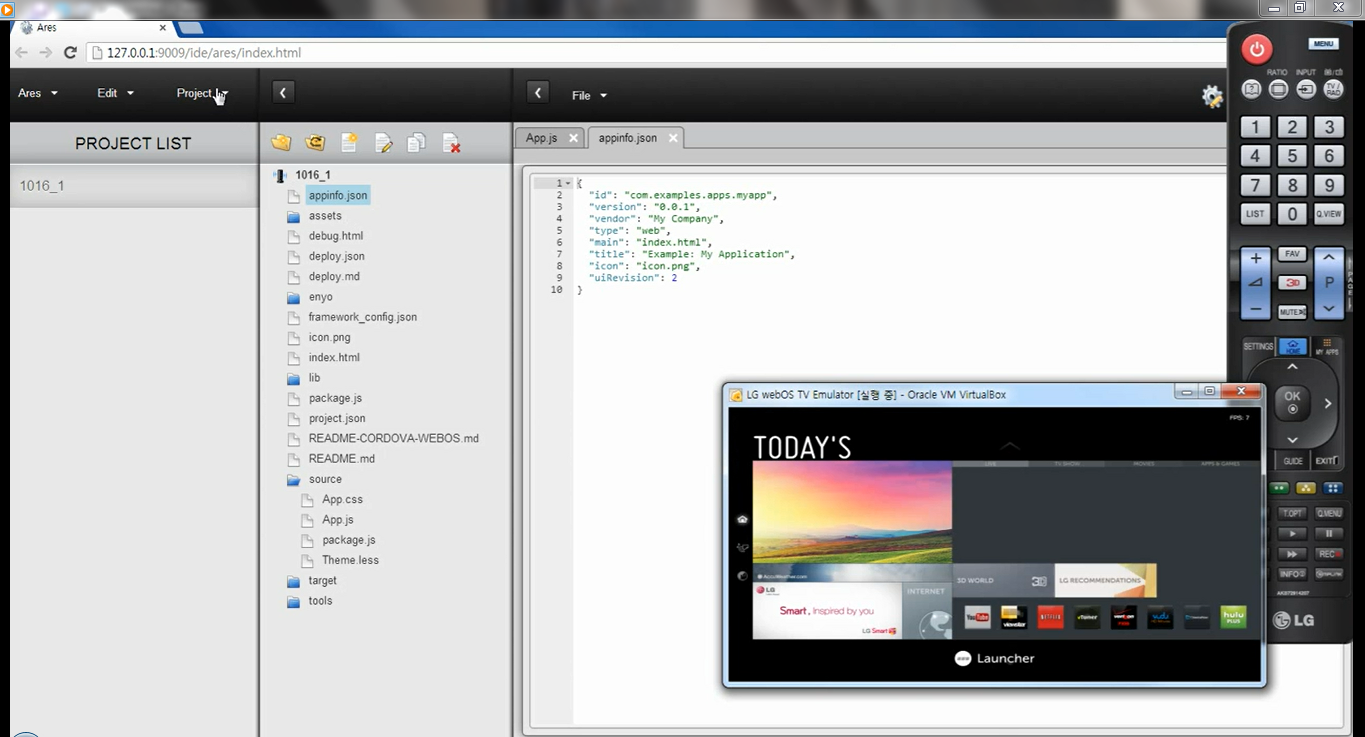
LG WebOS: HTML/CSS/JS
LG webOS uses web technologies like HTML, CSS, and JavaScript to create apps. The development environment is based on the webOS TV SDK. Download and install the SDK from the LG Developer site at https://webostv.developer.lge.com/.
To create a new app:
ares-generate -t basic myWebOSAppApp Layout
The generated app contains the following files and folders:
appinfo.json: Contains metadata about the app, such as the app ID, version, and required permissions.index.html: The main HTML file that defines the app's user interface.css/app.css: The main CSS file for styling the app.js/app.js: The main JavaScript file that contains the app's logic.
appinfo.json
{
    "id": "com.yourdomain.webostvapp",
    "version": "1.0.0",
    "vendor": "Your Company",
    "type": "web",
    "main": "index.html",
    "title": "webOS TV App",
    "icon": "icon.png",
    "largeIcon": "largeIcon.png",
    "bgColor": "#000000",
    "appDescription": "A sample webOS TV app",
    "requiredPermissions": [],
    "features": []
}
index.html
<!DOCTYPE html>
<html>
<head>
    <title>webOS TV App</title>
    <style>
        body {
            background-color: black;
            display: flex;
            justify-content: center;
            align-items: center;
            width: 100%;
            height: 100%;
        }
        h1 {
            color: white;
            font-size: 50px;
        }
    </style>
</head>
<body>
    <h1>Hello, webOS TV!</h1>
</body>
</html>
Use the webOS TV emulator, which is included in the SDK, to test your app.
Connecting To A Video Stream
In index.html
<!DOCTYPE html>
<html>
<head>
    <title>webOS TV Live Stream</title>
</head>
<body>
    <video id="videoPlayer" width="1280" height="720"></video>
    <script src="main.js"></script>
</body>
</html>
In main.js
const liveStreamUrl = 'LIVE_STREAM_URL';
const videoPlayer = document.getElementById('videoPlayer');
videoPlayer.src = liveStreamUrl;
videoPlayer.play();
OpenHAB has a webOS binding: https://www.openhab.org/addons/bindings/lgwebos/
Samsung: Tizen HTML/CSS/JS
Samsung Smart TV apps are also built using web technologies like HTML, CSS, and JavaScript. The development environment is based on Tizen Studio. Download and install it from the Tizen Developer site at https://developer.tizen.org/.
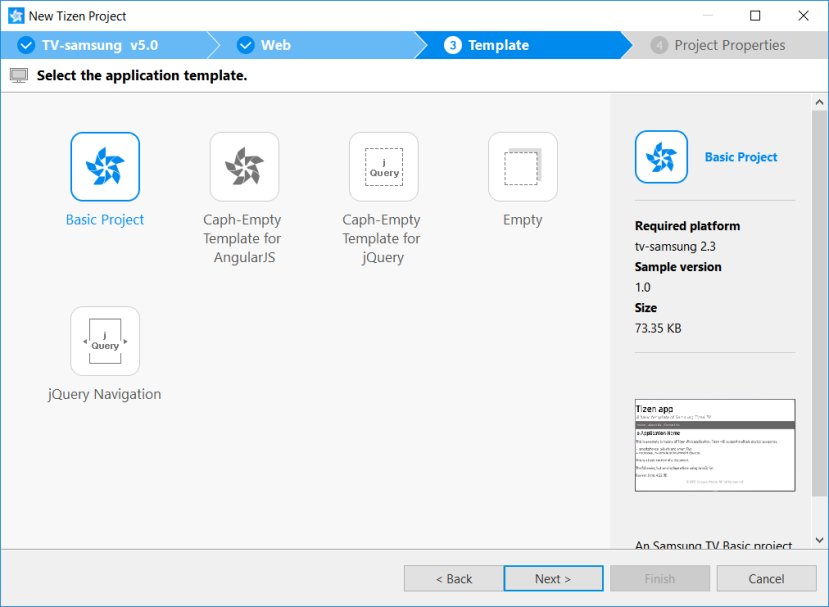
Open Tizen Studio and create a new project. Select "Template" as the project type, choose "TV" as the profile, and then select the "Basic Project" template. Enter a project name and click "Finish".
App Layout
The generated app contains the following files and folders:
config.xml: Contains metadata about the app, such as the app ID, version, and required permissions.index.html: The main HTML file that defines the app's user interface.css/style.css: The main CSS file for styling the app.js/main.js: The main JavaScript file that contains the app's logic.
config.xml
<?xml version="1.0" encoding="UTF-8"?>
<widget xmlns="http://www.w3.org/ns/widgets" xmlns:tizen="http://tizen.org/ns/widgets" id="http://yourdomain.com/tizentvapp" version="1.0.0" viewmodes="maximized">
    <tizen:application id="your.domain.TizenTVApp" package="your.domain" required_version="6.5"/>
    <content src="index.html"/>
    <feature name="http://tizen.org/feature/screen.size.all"/>
    <icon src="icon.png"/>
    <name>Tizen TV App</name>
    <tizen:profile name="tv"/>
</widget>
index.html
<!DOCTYPE html>
<html>
<head>
    <title>Tizen TV App</title>
    <style>
        body {
            background-color: black;
            display: flex;
            justify-content: center;
            align-items: center;
            width: 100%;
            height: 100%;
        }
        h1 {
            color: white;
            font-size: 50px;
        }
    </style>
</head>
<body>
    <h1>Hello, Tizen TV!</h1>
</body>
</html>
Connecting To A Video Stream
In index.html
<!DOCTYPE html>
<html>
<head>
    <title>Tizen TV Live Stream</title>
</head>
<body>
    <video id="videoPlayer" width="1280" height="720"></video>
    <script src="main.js"></script>
</body>
</html>
In main.js
const liveStreamUrl = 'LIVE_STREAM_URL';
const videoPlayer = document.getElementById('videoPlayer');
videoPlayer.src = liveStreamUrl;
videoPlayer.play();
Use the Tizen Emulator or a physical Samsung Smart TV to test your app. In Tizen Studio, right-click on the project and select "Run As" -> "Tizen Web Application" to deploy and run your app.
OpenHAB has a Samsung TV binding: https://www.openhab.org/addons/bindings/samsungtv/
Apple tvOS: Swift/TVML
tvOS requires developing with the tvOS SDK, which is based on iOS. Download and install Xcode from the Mac App Store or Apple Developer website (https://developer.apple.com/xcode/). Make sure you have the latest version that supports tvOS development. It's a familiar trek for app developers.

TVML (Television Markup Language) is an XML-based language used in tvOS apps to define the layout and presentation of the user interface. TVML is particularly useful for creating client-server apps, where the client app on the Apple TV retrieves dynamic content from a server and displays it using pre-defined TVML templates. The advantage of using TVML is that it simplifies the process of creating visually consistent interfaces for tvOS while allowing for easier updates to the app's content and layout.
For Swift:
Open Xcode and create a new project. Select "tvOS" as the platform and choose the "Single View App" template. Enter a name and bundle identifier for your app. Choose Swift as the programming language.
The generated app contains several files and folders, but the most important ones for building your app's user interface and functionality are:
Main.storyboard: The main Interface Builder file that defines the app's user interface using visual tools.ViewController.swift: The main Swift file that contains the app's logic and handles user interactions.
Open the "Main.storyboard" file, drag a UILabel from the Object Library onto the main view, and set the text to "Hello, World!". Align the label in the center of the view using Auto Layout constraints.
AppDelegate.swift
import UIKit
import TVMLKit

@UIApplicationMain
class AppDelegate: UIResponder, UIApplicationDelegate, TVApplicationControllerDelegate {

    var window: UIWindow?
    var appController: TVApplicationController?

    func application(_ application: UIApplication, didFinishLaunchingWithOptions launchOptions: [UIApplication.LaunchOptionsKey: Any]?) -> Bool {

        window = UIWindow(frame: UIScreen.main.bounds)

        let appControllerContext = TVApplicationControllerContext()
        if let javascriptURL = URL(string: "http://localhost:9001/main.js") {
            appControllerContext.javaScriptApplicationURL = javascriptURL
        }

        appController = TVApplicationController(context: appControllerContext, window: window, delegate: self)

        return true
    }

    // Add other AppDelegate methods if needed.
}
For TVML:
In Xcode, create a new tvOS project and select the "TVML Application" template.
When developing a tvOS app using TVML, you create a client-server app. The client app runs on the Apple TV and is responsible for displaying the user interface and handling user interactions. The server-side component provides the dynamic content and TVML templates that define the app's interface.
You create TVML templates for different views and interfaces in your app, as you would with HTML. These templates define the layout, presentation, and navigation elements using TVML elements like list, grid, banner, and button. You can find a list of available TVML elements in the Apple Developer documentation: https://developer.apple.com/documentation/tvml
index.tvml
<?xml version="1.0" encoding="UTF-8" ?>
<document>
    <alertTemplate>
        <title>Hello, TVML!</title>
        <description>This is an example TVML app.</description>
        <button>
            <text>OK</text>
        </button>
    </alertTemplate>
</document>
You use TVJS to load and manipulate TVML templates, handle user events, and communicate with your server component. TVJS provides a set of APIs for managing navigation, loading templates, and handling user input.
main.js
App.onLaunch = function(options) {
    var templateURL = 'http://localhost:9001/index.tvml';
    var parser = new DOMParser();

    function loadTemplate(url, callback) {
        var request = new XMLHttpRequest();
        request.open("GET", url, true);
        request.onreadystatechange = function() {
            if (request.readyState != 4 || request.status != 200) {
                return;
            }
            var document = parser.parseFromString(request.responseText, "application/xml");
            callback(document);
        };
        request.send();
    }

    loadTemplate(templateURL, function(document) {
        var alert = document.getElementsByTagName("alertTemplate").item(0);
        var button = document.getElementsByTagName("button").item(0);

        button.addEventListener("select", function() {
            navigationDocument.dismissModal();
        });

        navigationDocument.presentModal(alert);
    });
}
In the AppDelegate.swift file, set the server URL that hosts your TVML templates, JavaScript files, and other resources. The TVApplicationController will use this URL to load the initial TVML template and associated JavaScript files.
Connecting To A Video Stream
In AppDelegate.swift
// ...
import TVMLKit

class AppDelegate: UIResponder, UIApplicationDelegate, TVApplicationControllerDelegate {
    // ...
    func application(_ application: UIApplication, didFinishLaunchingWithOptions launchOptions: [UIApplication.LaunchOptionsKey: Any]?) -> Bool {
        // ...
        if let javascriptURL = URL(string: "http://localhost:9001/main.js") {
            appControllerContext.javaScriptApplicationURL = javascriptURL
        }
        // ...
    }
    // ...
In main.js
App.onLaunch = function(options) {
    var template = `<?xml version="1.0" encoding="UTF-8" ?>
        <document>
            <head>
                <style>
                    .videoContainer {
                        tv-position: center;
                        tv-align: center;
                    }
                </style>
            </head>
            <body>
                <videoPlayer class="videoContainer">
                    <video src="LIVE_STREAM_URL" />
                </videoPlayer>
            </body>
        </document>`;

    var parser = new DOMParser();
    var document = parser.parseFromString(template, "application/xml");
    navigationDocument.pushDocument(document);
}
Connect an Apple TV device or start the tvOS simulator, then click the "Run" button in Xcode to build and deploy your app.
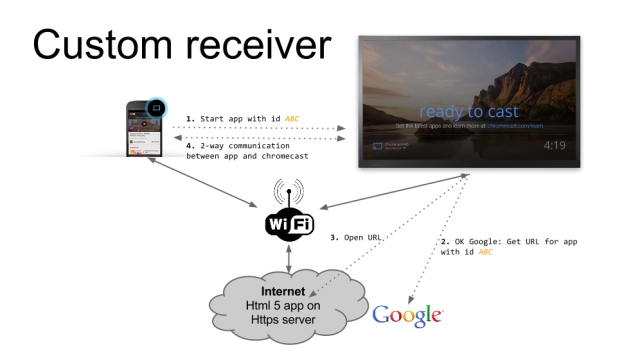
Chromecast: HTML/JS/CSS
Developing a Chromecast app involves creating a sender app and a receiver app. The sender app runs on a mobile device or in a web browser, while the receiver app runs on the Chromecast device. The sender app sends media content or instructions to the receiver app, which then plays the content on the TV.
Sign up for a Google Cast Developer account at https://cast.google.com/publish and pay a one-time registration fee. This account allows you to create and manage your Chromecast apps. You'll need to set up the Google Cast SDK in your development environment.
Develop a sender app for your chosen platform (Android, iOS, or web) that includes the Google Cast SDK. This app allows users to connect to a Chromecast device, browse and select content, and control media playback.
index.html
<!DOCTYPE html>
<html>
<head>
  <title>Chromecast Sender App</title>
  <script src="https://www.gstatic.com/cv/js/sender/v1/cast_sender.js?loadCastFramework=1"></script>
</head>
<body>
  <button is="google-cast-button"></button>
  <button id="playButton">Play</button>
  <button id="pauseButton">Pause</button>
  <script src="sender.js"></script>
</body>
</html>
sender.js
document.addEventListener('DOMContentLoaded', function() {
  const playButton = document.getElementById('playButton');
  const pauseButton = document.getElementById('pauseButton');

  // Initialize the Cast context and set the receiver app ID
  const castContext = cast.framework.CastContext.getInstance();
  castContext.setOptions({
    receiverApplicationId: 'YOUR_RECEIVER_APP_ID',
    autoJoinPolicy: chrome.cast.AutoJoinPolicy.ORIGIN_SCOPED
  });

  // Add event listeners for the play and pause buttons
  playButton.addEventListener('click', function() {
    const session = castContext.getCurrentSession();
    if (session) {
      const media = session.getMediaSession();
      if (media) {
        media.play();
      }
    }
  });

  pauseButton.addEventListener('click', function() {
    const session = castContext.getCurrentSession();
    if (session) {
      const media = session.getMediaSession();
      if (media) {
        media.pause();
      }
    }
  });
});
The receiver app runs on the Chromecast device and plays the content sent by the sender app. There are two types of receiver apps:
- Default Media Receiver (DMR): A pre-built receiver app provided by Google that supports basic media playback. You can use the DMR if your app doesn't require custom UI or specialized functionality.
- Custom Receiver: A custom HTML, CSS, and JavaScript app that you develop to support advanced features or a custom user interface. To create a custom receiver, follow the guidelines at https://developers.google.com/cast/docs/custom_receiver.
receiver.html
<!DOCTYPE html>
<html>
<head>
  <title>Chromecast Custom Receiver</title>
  <script src="https://www.gstatic.com/cast/sdk/libs/caf_receiver/v3/cast_receiver_framework.js"></script>
</head>
<body>
  <cast-media-player id="player"></cast-media-player>
  <script src="receiver.js"></script>
</body>
</html>
receiver.js
const context = cast.framework.CastReceiverContext.getInstance();
const playerManager = context.getPlayerManager();

// Optional: Add custom player event listeners or message bus handling

context.start();
Register your receiver app in the Google Cast Developer Console. This step generates an Application ID that you'll use in your sender app to identify and launch your receiver app. If you're using a custom receiver, provide the URL of your receiver app's HTML file.
You test your sender and receiver apps together using a physical Chromecast device or the Cast device emulator available in the Google Home app on Android.
OpenHAB has a Chromecast binding: https://www.openhab.org/addons/bindings/chromecast/
Frameworks & Protocols
This is clearly a spaghetti nightmare we haven't had to deal with since the early days of the web browser wars.
The full list of different platforms is here: https://en.wikipedia.org/wiki/List_of_smart_TV_platforms
Cross-Platform Libraries
- react-tv - React development for TV: renderer for low memory applications and Packager for WebOS, Tizen, Orsay.
- TOAST - Samsung open-source framework for multi-platform TV apps developemnt.
- Enyo - LG framework for development apps for all major platforms, from phones and tablets to PCs and TVs.
- Smartbox - Smart TV universal library for Samsung, LG, Philips, SmartTV Aliance, STB Mag app development.
- Mautilus Smart TV SDK - A platform-agnostic framework for developing TV Apps. Supports Samsung, LG, Philips, Sony, Panasonic and VESTEL Smart TVs.
- BBC TAL - An open source library for building applications for Smart TV developed by BBC engineers.
- PureQML TV - A declarative front-end framework for web-based SmartTV/STB platforms. Has experimental support of Android TV.
- ZombieBox - An open source Smart TV framework. Strongly typed JavaScript, component based, built-in D-PAD navigation management, abstract video API with DRM for all platforms. Supports many platforms like Tizen, webOS, Android TV, etc.
Remote control protocols
- DLNA - Industry-wide standard for sharing data over a home network. Depending on the DLNA-compatible devices you own, you might be able to stream films from your laptop to your TV, play an MP3 stored on your phone over your hi-fi system, or print a photo from your tablet on your home printer.
- DIAL - Developed by Netflix and Google, this protocol alows client devices (like smartphone, tablet, or computer) to discover apps on server devices (like a smart TV or streaming box) and launch content on them.
- Wi-Fi Direct - Standard enabling devices to easily connect with each other without requiring a wireless access point.
- Miracast - Standard for wireless connections from devices (such as laptops, tablets, or smartphones) to displays (such as TVs, monitors or projectors). Works over Wi-Fi Direct.