Programmable Cloud Wifi Networks, Linux Router APIs, And Smarter Hospitality

To answer your question, yes, there are Wifi routers with APIs you can talk to in order to dynamically configure their settings, like hotspots and SSIDs. Wifi doesn't have to suck; it can be as programmable as any other IoT hardware. You don't have to flirt with ugly open source router firmware. You can do it all yourself.
Buy router from store. Plug in. Log into admin screen. Set network name. Set VPN, uPnP, firewall. Think of hilarious network SSID for the neighbours to be outraged at. Check into hotel or conference. Log on to foreign network. Wait for annoying portal screen. Put in same details. Get three hours access for $5.00.
Save Time: Meet Mikrotik RouterOS
You can spend hours trying to work out whether the usual suspects (Cisco, Linksys, Netgear, D-Link etc) have APIs your code can talk to. Don't bother. There's a much better alternative you probably haven't heard of if you're not a networking professional.

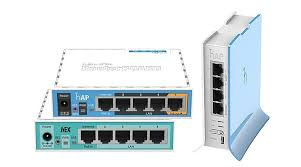
The products of Latvia's 20th largest IT company, MikroTik (https://mikrotik.com/), are all over Amazon at staggeringly cheap prices. Founded in 1996, they have 300 or so employees, build their warez for the English-speaking market, and have an epic laundry list of ideas out in the real world to make developers drool.
MikroTik have 2 main products, which aren't imaginatively named:
- the hardware (RouterBOARD)
- the software (RouterOS, https://wiki.mikrotik.com/wiki/Manual:RouterOS_FAQ)
We're interested in the latter. RouterOS runs the router as an embedded Linux box a bit like a Raspberry Pi . Kernel 3.3.5 to be exact. You can even download the ISO to work with it before you buy the hardware for $20.
It has SIM-card support for 3G/LTE. And the power cord is mini-USB, like a phone, which can take a charger bank to make it entire portable.
RouterOS (https://mikrotik.com/software) allows access via:
- Serial port (REALLY old school)
- Telnet (old school)
- SSH (like a Jedi)
- Desktop (over port 8291 via a Windows program called "Winbox": https://wiki.mikrotik.com/wiki/Manual:Winbox)
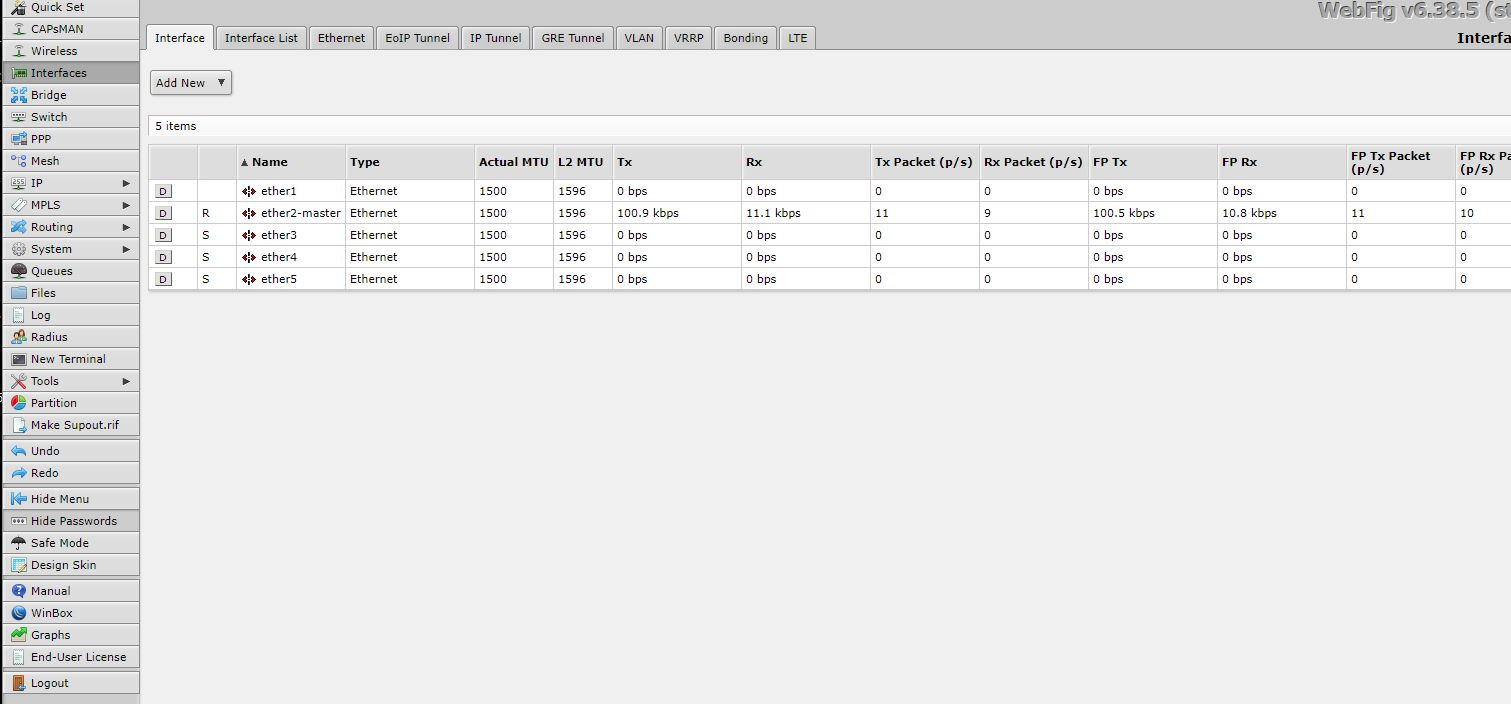
- Web (over port 90/443 via a cPanel-style web portal software called "Webfig": https://wiki.mikrotik.com/wiki/Manual:Webfig).
- API (over port 8728 via a proprietary TCP protocol: https://wiki.mikrotik.com/wiki/Manual:API)
In case you were wondering, it's how platforms like SocialWifi (https://socialwifi.com/) work. When you can program the router, a whole world of ideas open up.
Let's say you're a web designer helping a restaurant with the graphics of their website. Persuading your client to spend chips on a MikroTik device with RouterOS can also help you include a design-sync'd "Wifi login" page (captive portal screen), 20 Wifi networks, and probably turn you into their IT technician.
For purchases:
- MikroTik on Amazon: https://www.amazon.com/s?srs=7465625011
- Direct Purchasing: https://mikrotik.com/buy
First Steps & Access, Because HaXXors
Wifi routers don't really need instructions. Plug it in, switch it on, connect to the Ethernet or Wifi setup network (which will be named "Mikrotik-MODELSTR"). Do the usual thing and follow the manual. The default IP range is 192.168.88.* as is typical.
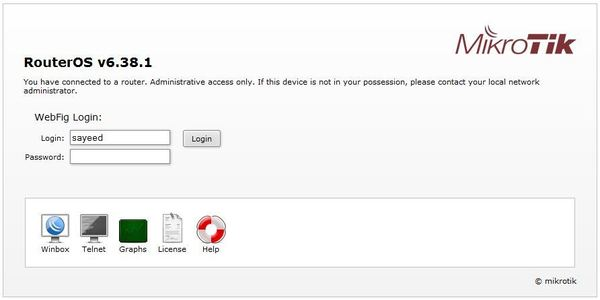
Change the admin password. Obviously. The default username is "admin", and the password is empty/blank.
- More: https://help.mikrotik.com/docs/display/ROS/First+Time+Configuration
- Phone app: https://play.google.com/store/apps/details?id=com.mikrotik.android.tikapp&hl=en_US
Everything from hereon assumes you are on a private network behind a NAT/firewall and you're the only one with access. As in, you bought this thing as a secondary experimental unit, and plugged into an Ethernet port to get a DHCP lease from an existing network. Only an idiot puts an unsecured router into the public domain.
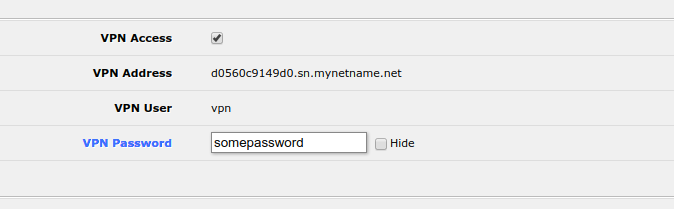
If you're not, hit "Quick Set" and set up VPN access to the router to view the web interface outside the building. Do this instead of the way Netgear etc allow you to expose the HTTP server on your WAN IP.
More details on remote access:
- https://mikrotrik.com/how-to-setup-vpn-in-mikrotik-router/
- https://www.timigate.com/2016/01/how-to-configure-mikrotik-pptp-remote-access-vpn.html
The first thing you're going to do is want to set the router's hostname for when you're trying to find it on the network. The default is mikrotik.lan. Go to System > Identity:
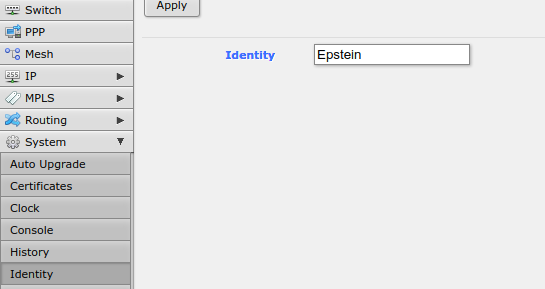
If you set it to "Acme", it will be recognisable on the network as "acme.local", "acme.lan", or such.
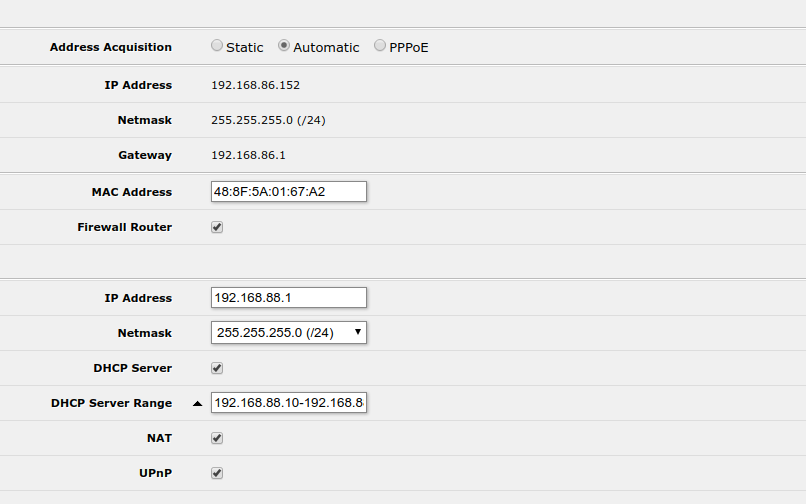
The quick way to find the router's own IP details (e.g. it's Ethernet IP, WAN address, DNS, gateway etc) is the "Quick Set" menu, which will also let you set the basic Wifi network configuration.
RouterOS has a concept of "security profiles" as many other devices do. It comes with a preset one helpfully named "default". Before we assign credentials, we need to create a security profile. For example, if we want to change the Wifi password, ideally we need to create a new profile with a new password, and assign that profile to the SSID as a replacement.
If you're on a private network and you're sure it's no risk, setting up remote access (for example, between LANs) isn't too tough. All you need to do is add firewall rules to allow TCP traffic to port 80 and 443. That's all it takes to access Webfig from an external IP - which is why you need to use the VPN. Then just type http://routerhostname.lan/ into your browser.
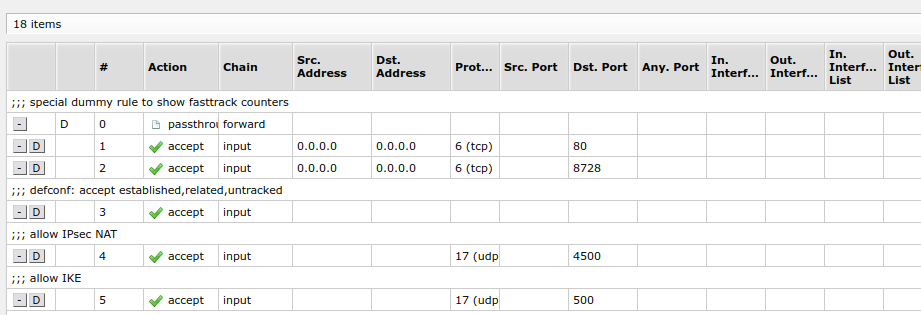
Note: the order in which you set the rules is critical. Allowing traffic on ports 22, 80, or 443, needs to be set at the top of the firewall rules list before anything else. After you set the rule, drag and drop them to the start of the list.
For a list of ports and services: https://wiki.mikrotik.com/wiki/Manual:IP/Services
More on localised Webfig access:
- https://forum.mikrotik.com/viewtopic.php?p=697327
- https://serverfault.com/questions/676112/mikrotik-cant-access-webfig-from-external-cant-ssh-into-router-from-extern
- https://ixnfo.com/en/configuring-remote-access-in-mikrotik-router.html
- https://www.reddit.com/r/mikrotik/comments/ed9emr/how_to_remotely_access_mikrotik_router/
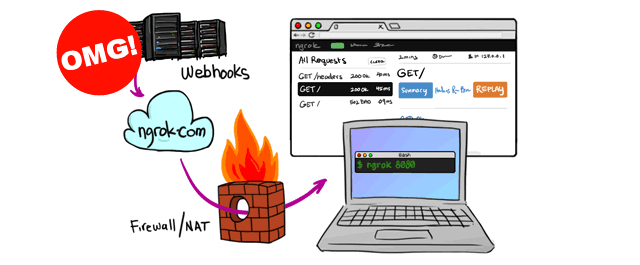
If you're feeling ambitious and have a separate machine on the same network (e.g. a little Linux box or a spare PC), you can go one louder: use nGrok (https://ngrok.com/) to set up an HTTPS or TCP tunnel from the web. It's $10 or so a month to use custom subdomains like router1.mydomain.com.
Assuming your friendly machine can access the router on the internal network, the setup is easy. If we assume the router's hostname on your LAN is acme.lan, we can run nGrok on the spare machine to proxy requests to it from the web, like so:
ngrok http -region=us -hostname=router1.mydomain.com -auth="username:password" acme.lan:80More: https://ngrok.com/docs
Talking to RouterOS API With Libraries
This isn't REST or HTTP. It's not SOAP either. It's from way back. It's crucial to understand what the RouterOS API is and how it works.
Firstly, it's a TCP-based client/server protocol which uses simple plain text commands and runs on port 8728. A bit like simulating a serial port connection for the Winbox desktop software. It wasn't built for the web.
It's not secure. If you need it to be, you're going to need to use an SSH tunnel or a wrapper service like sTunnel (https://www.stunnel.org/).
"Communication with the router is done by sending sentences to the router and receiving one or more sentences in return. A sentence is a sequence of words terminated by a zero length word. A word is part of sentence encoded in certain way - encoded length and data.
Communication happens by sending sentences to the router and receiving replies to sent sentences. Each sentence sent to router using API should contain command as a first word followed by words in no particular order, end of sentence is marked by zero length word. When the router receives a full sentence (command word, no or more attribute words and zero length word) it is evaluated and executed, then a reply is formed and returned."
Reference: https://wiki.mikrotik.com/wiki/API_command_notes
A TCP connection is a socket. HTTP is a protocol which runs over TCP. You can (simplistically) think of it as having to construct a raw HTTP request each time instead of the work being done by the software for you. You're the web server doing the transaction, not the client being provided with it.

In its rawest form, using the popular Laravel library:
$socket = stream_socket_client(
    'ssl://192.168.88.1:8728', // connection string, can just be tcp://
    $socket_error_num, // var to store error number
    $socket_error_str, // var to store error str
    10, // timeout
    STREAM_CLIENT_CONNECT,
    stream_context_create([
        'ssl' => [
            'ciphers'          => 'ADH:ALL',
            'verify_peer'      => false,
            'verify_peer_name' => false
        ]
    ])
);

stream_set_timeout($socket, 10);

// Just login with our credentials
$query = new Query('/login', [
    '=name=myusername',
    '=password=mypass',
]);

fclose($socket);- https://www.php.net/manual/en/function.stream-socket-client.php
- https://www.php.net/manual/en/function.stream-context-create.php
The idea is to look up the console versions of the API "sentences", and use a library as a wrapper client. There's not much by way of an object-orientated approach to go by - you have to work a lot of it out by reading through the docs.
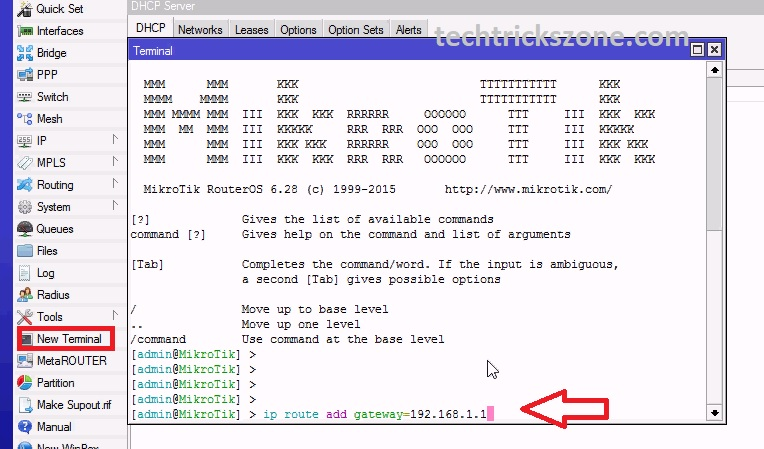
Examples, using a mixture of library syntax:
/system identity set name=epsteindidntkillhimself/user set 0 password="mynewpassword"/ip route add gateway=1.2.3.1/interface wireless set wlan1/interface/vlan/remove/system/rebootIf you want to know what to send, you need to look it up in the RouterOS documentation, and guess.
You're going to need a library to make life easier. There are plenty.
Python
- https://librouteros.readthedocs.io/en/latest/
- https://pypi.org/project/RouterOS-api/
- https://wiki.mikrotik.com/wiki/Manual:API_Python3
PHP
- https://packagist.org/?query=routeros
- https://mum.mikrotik.com/presentations/BG14/boen-en.pdf
- https://github.com/BenMenking/routeros-api
- https://wiki.mikrotik.com/wiki/Api_php_template
- https://github.com/EvilFreelancer/routeros-api-php
Node
- https://www.npmjs.com/search?q=routeros
- https://www.npmjs.com/package/node-routeros
- https://github.com/Trakkasure/mikronode
Java
Go
- https://wiki.mikrotik.com/wiki/API_in_Go
- https://github.com/go-routeros/routeros
- https://github.com/jda/routeros-api-go
Ruby
C
What Can You Do? Anything. Everything.
We can't go through everything; one look at the Webfig or Winbox UI should give you a good overview of what can be programmed. Amongst other things, we immediately have a case for a "cloud" router where we can manage multiple devices and networks.
Things like:
- Allowing remote IT support of multiple routers;
- Syncing networks across locations;
- Automate setup provisioning;
- Add/removing Wifi SSIDs;
- Manage an inter-connected mesh;
- Managing usernames/passwords;
- Adding/removing "hotspot" captive portals;
- Monitoring status, traffic, and/or setting limits;
- Applying dynamic QoS (or VLANs, MPLS)
- Setting proxy servers;
- Managing VPN clients;
More: https://wiki.mikrotik.com/wiki/Manual:RouterOS_features
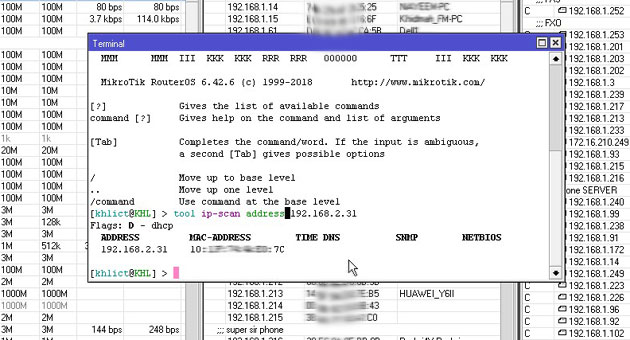
Before anything else, we want to know what's going on, so let's get some stats:
interface print stats
interface monitor-traffic
system resource
ip traffic-flow
tool bandwidth-test 10.0.0.32 duration=15s
ip arp print where interface=wlan1
interface wireless monitor wlan1
Let's say you wanted to give everyone in your home or office their own Wifi network; particularly so you can turn it off when required without switching the web off for everyone (GO TO BED!). RouterOS can host 100+ Virtual Access Points on top of its default. We can do any of these via SSH/console, or via the socket API.
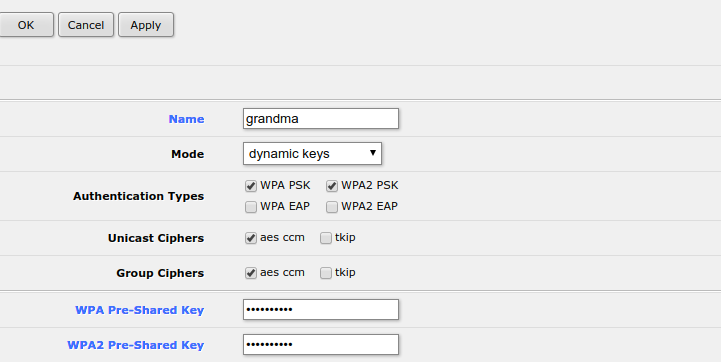
First, let's create a security profile for Grandma, and another one for Grandpa. The wireless passwords will be "beatles" and "rollingstones" after their favourite bands.
wireless security-profiles add name=grandma wpa2-pre-shared-key="beatles" mode=dynamic-keys authentication-types=wpa2-psk

wireless security-profiles add name=grandpa wpa2-pre-shared-key="rollingstones" mode=dynamic-keys authentication-types=wpa2-psk
Now we can create Virtual AP networks named "Grandma-Wifi" and "Grandpa-Wifi" for them to connect to separately:
wireless add mode=ap-bridge master-interface=wlan1 ssid=Grandma-Wifi security-profile=grandma

wireless add mode=ap-bridge master-interface=wlan1 ssid=Grandpa-Wifi security-profile=grandpa
Or perhaps we just want to change the Wifi password of the main network (index 0 in the list of APs):
wireless set 0 security-profile=grandmaOr even just change the Wifi network name (SSID):
wireless set wlan1 ssid=Family-WifiMaybe we just want to straight-up block device access from Nanna so she can't use the Internet at all, not just Facebook:
ip firewall filter add chain=forward action=drop time="20:00:00-12h,mon,tue,wed,thu,fri,sat,sun" src-mac-address=00:00:00:00:00:00Maybe that's too harsh, so we could add a captive portal hotspot ("Walled Garden") where she and her friends could agree not to post on social media. But let us go through automatically:
ip hotspot setup
ip hotspot user add name=nanna password=nofacebook
ip hotspot ip-binding add type=bypassed mac-address="01:23:45:67:89:AB" address=192.168.88.254 to-address=192.168.88.254
If we need to open or close a port, it's trivial. For example, Elasticsearch running through port 9200 on machine 192.168.1.1:
ip firewall nat add chain=dstnat dst-port=9200 action=dst-nat protocol=tcp to-address=192.168.1.1 to-port=9200Or we can block by keyword to provide a basic filter for non-technical users:
ip firewall filter add chain=forward protocol=tcp dst-port=80,443
in-interface=ether2-LAN out-interface=ether1-WAN action=drop content=epstein
If we were using the Laravel library (see: https://github.com/EvilFreelancer/routeros-api-php/tree/master/examples), we could take this command line statement:
ip hotspot ip-binding printAnd use it like so by replacing the spaces with forward slashes (/):
use \RouterOS\Client;
use \RouterOS\Query;

// Initiate client with config object
$client = new Client([
    'host' => '192.168.1.3',
    'user' => 'admin',
    'pass' => 'admin'
]);

// Create "where" Query object for RouterOS
$query =
    (new Query('/ip/hotspot/ip-binding/print'))
        ->where('mac-address', '00:00:00:00:40:29');

// Send query and read response from RouterOS
$response = $client->query($query)->read();

var_dump($response);
Or this command to add a new bridge:
interface bridge add name=vlan911-bridge vlan-filtering=noAnd invoke it this way with an array of arguments:
    // Add bridges
    $query = new Query('/interface/bridge/add', [
        "=name=vlan911-bridge",
        'vlan-filtering=no'
    ]);

    $response = $client->wr($query);
    print_r($response);
After that, it's up to your imagination.
-A-