How we Google Streetviewed the Bahamas on a Shoestring

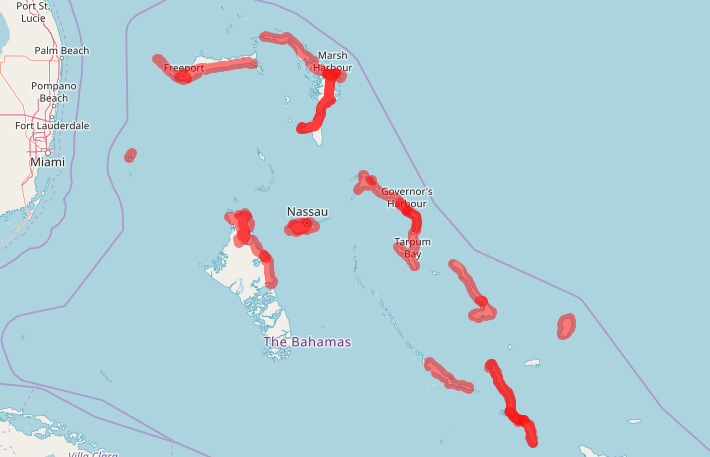
11 islands, 1800km, and 160,000 4k images later…
Update: tl;dr you can browse the Bahamas in 360 degrees by visiting www.bahamasphere.com (in progress).
When you’re looking at a folder of 3000 4K images which crash the official Street View app every time you try and import them, it’s time for the 19,000-thousandth rethink. The day before, it was how to avoid your DIY Street Car being turned into a new version of the Delorian from “Back to the Future” if it hit the unfeasibly-low power cables drooping over an island village’s badly-laid road. The Bahamas, in and of itself, is an ongoing test of personal daily resilience.
Street View is really, really fun. Not just slightly fun; hilariously good fun. To think that you’d get to be involved in the same VR technology a bunch of camera nerds started in 2006 never fails to trigger a pause for thought. 360 photography is gaining ground quickly. And it’s a whole new beast.
NB: if you just want to look at the end product, skip all this and go visit the image library site (in dev, send me a DM) or pick up the Aliv “Discover” app.
Why isn’t there Street View of Nassau?
A year or two back, Google quietly introduced the Street View Readyprogram (https://developers.google.com/streetview/ready/), which allowed electronics manufacturers to certify their 360 photography products as being able to automatically submit content to Google Maps. You can’t film the whole world yourself.
Coincidentally, I saw it while talking shit on the phone to the British CEO of the Bahamas’ newest mobile network (Aliv, bealiv.com), Damian Blackburn, who was, ahem, attempting to play golf. Despite being so small, yet describing itself as the Caribbean tourist hub, Nassau didn’t have Street View. A plan started to form. All we had to do — so we thought — was buy the camera.
Understanding How 360 Imagery Works
It’s simple really: 360 photos are illusory, zoomable “spheres” which can be chained together in 10ft intervals at a latitude/longitude on the map. They are instantiated with a “pose” (bearing, speed, altitude etc), and “connected” to each other programmatically. You transition through each connected sphere with animated “controls”. They turn a flat vector map into a video game.

To describe the photo “sphere”, you need additional information to describe the shape geometry, which is encapsulated as Spherical Metadata (https://developers.google.com/streetview/spherical-metadata), and published into “parallel” companion files via the XMP spec (https://www.adobe.com/products/xmp.html).
Whatever you want to do with Street View, you start here: https://www.google.com/streetview/publish/

Anyone can be a Street View Photographer now. Once you have submitted 50 approved photos, you reached “trusted” status.
So How Do You Build Your Own Street View Car?
Here’s the key fact to remember when doing an “auto” project: 1 second at 30mph is 45 feet in distance. Street View ideally requires 10ft or less between photo spheres. If you want your product to be Street View Auto-Ready, it needs to be able to record a geo-tagged 7.5-megapixel image every 10ft at whatever speed it is traveling. And that is very, very boring if you are driving 30mph on a motorway where everyone else is going 70+mph.
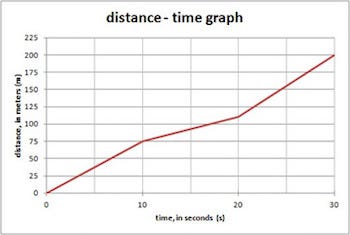
You’re not going to travel 35mph for 100 miles on an empty road with no features. As the rule states, don’t make the perfect the enemy of the good. A picture every 50–100ft is absolutely fine. If you’re travelling 60mph, a 1-second interval is going to 0.1km. You don’t need 10,000 photos of trees. It’s not a big deal.
The most influential factor is the sun: when shooting a 360 image, the optimal position is for the sun to be overhead, at its brightest — not shooting more into any one lens than any other. For practical purposes, that means you have a timeframe of 11am — 3pm each day.
Anything outside of those hours, and the sun is shining into one side of the camera more than the others, so the stitching process will produce an ugly “halo” in the final image which can only be removed by individual editing using programs like Premiere.
In terms of vehicles, you don’t have a lot of options, because any surface you put the camera on is going to consume 50% of the lower part of the picture. In that case, you need to raise the POV to at least 4–8ft higher than a car roof (imperceptible to the viewer).
You can:
a) Create a movie-style roof-rack rig, with suckers and grip (aka the “Hollywood”, or the “Alicia” as it’s pretentious and doesn’t work);
b) Use a pre-sold camera mount on the roof (aka the “Workshop”).
Or if you’re in the developing world, you could do what we had to end up doing:
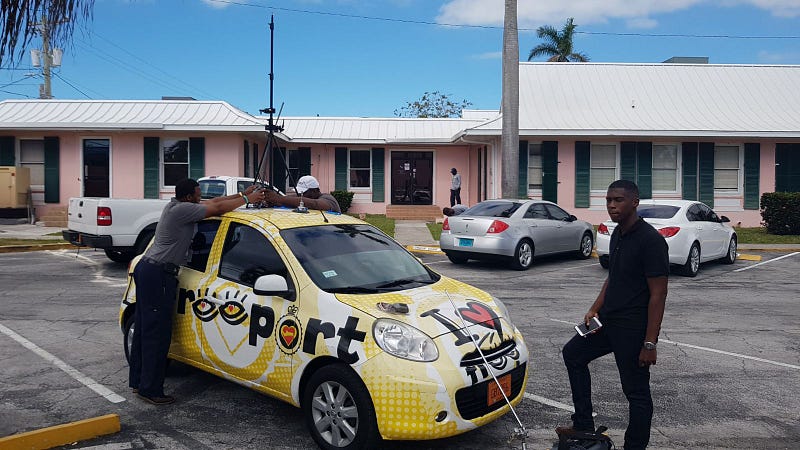
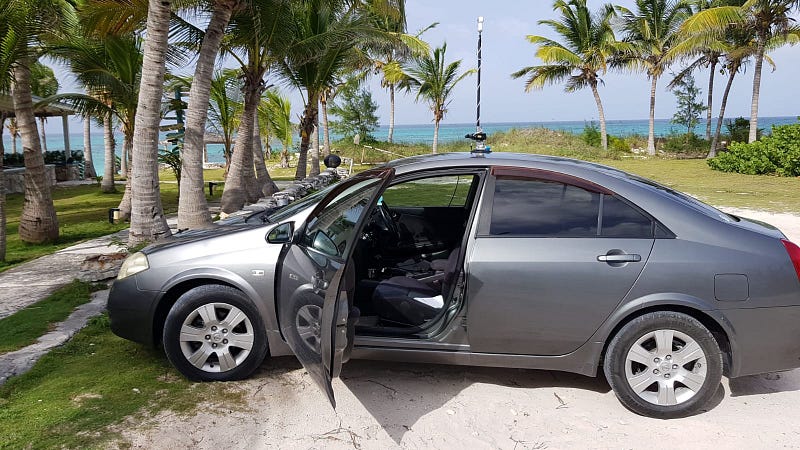
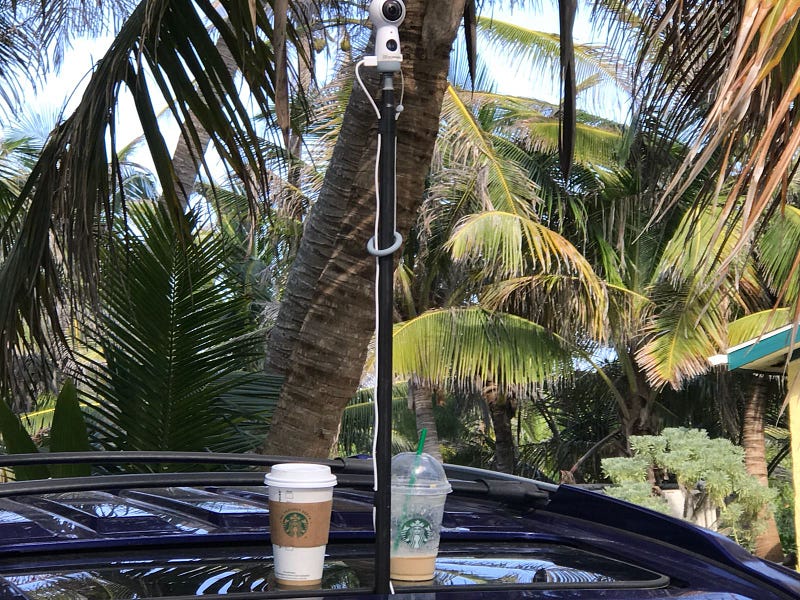
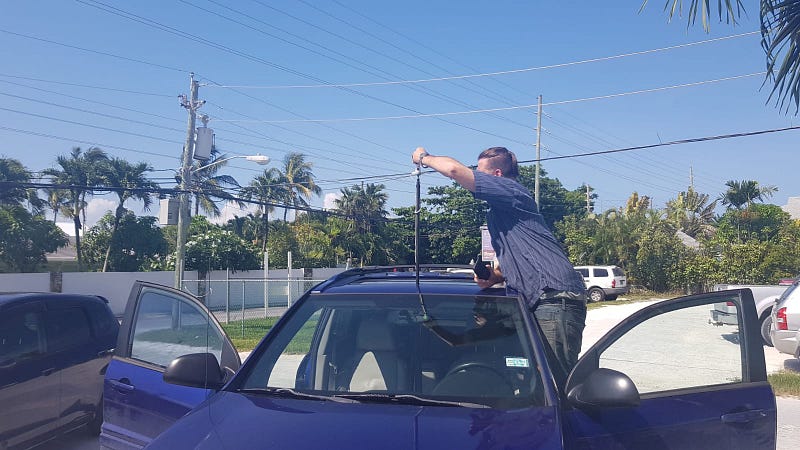
c) Pipe the tripod through a sunroof (aka the “West Palm Martini”) **;
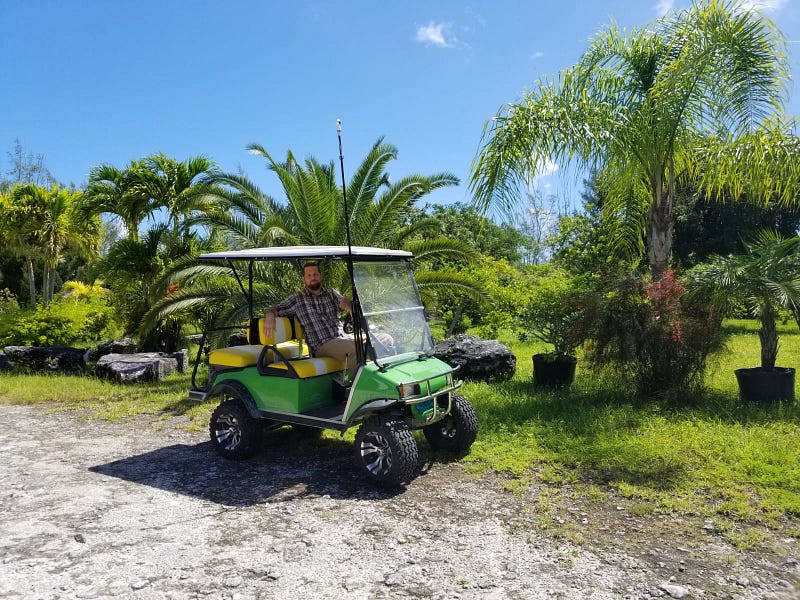
d) Duct-tape the tripod to the frame of a golf cart (aka the “Flagpole”);
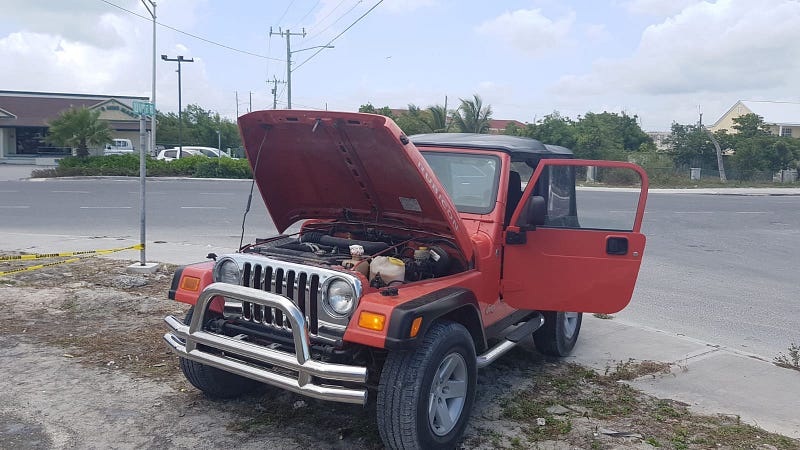
e) Duct-tape the tripod to the inner right front frame of a Jeep Wrangler (aka the “Safari”);
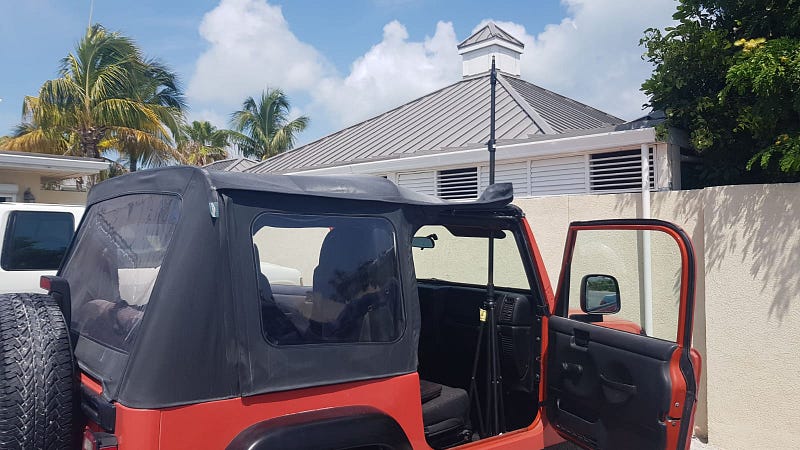
e) Duct-tape the top of a tripod to a suction cup (aka the “Shark Fin”).
Why not use a roof rack? Because when you navigate southwards in the photo sphere, all you see is a massive metal rig. You want to minimise the conspicuousness of the monopod underneath as far into the camera’s cylindrical “blind spot” as you possibly can.
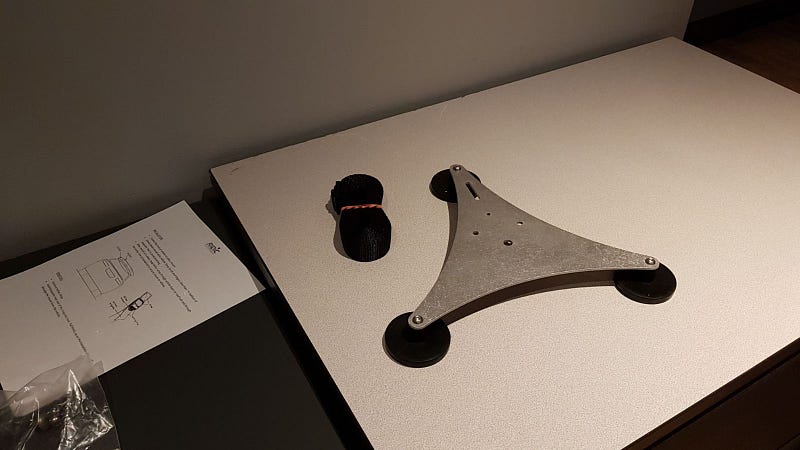
To mount the camera, we needed, firstly, that industrial-grade monopod or tripod. We used a 10ft Linco steel light stand (https://www.amazon.com/gp/product/B004628FK0/), which really, really took a hammering.
We also picked up some Hague suction mounts (https://www.haguecamerasupports.com/car-mounts-suction-pads/), and Manfrotto clamps (https://www.manfrotto.us/super-photo-clamp-without-stud-aluminium). To be cool, mostly.
You start out with these grand ideas to build a spaceship, and you soon hit some problems:
- Potholes destroy camera rigs;
- On islands, people don’t have “continental” cars with sunroofs (if they know what a sunroof is);
- Even fewer of them have Jeep Wranglers;
- They’re rarely maintained well.
- Those that are, don’t always have working electric supply.
Programmer Novelty Meets Hollywood Normality
Let’s start with the ideal urban camera setup, and devolve from there.
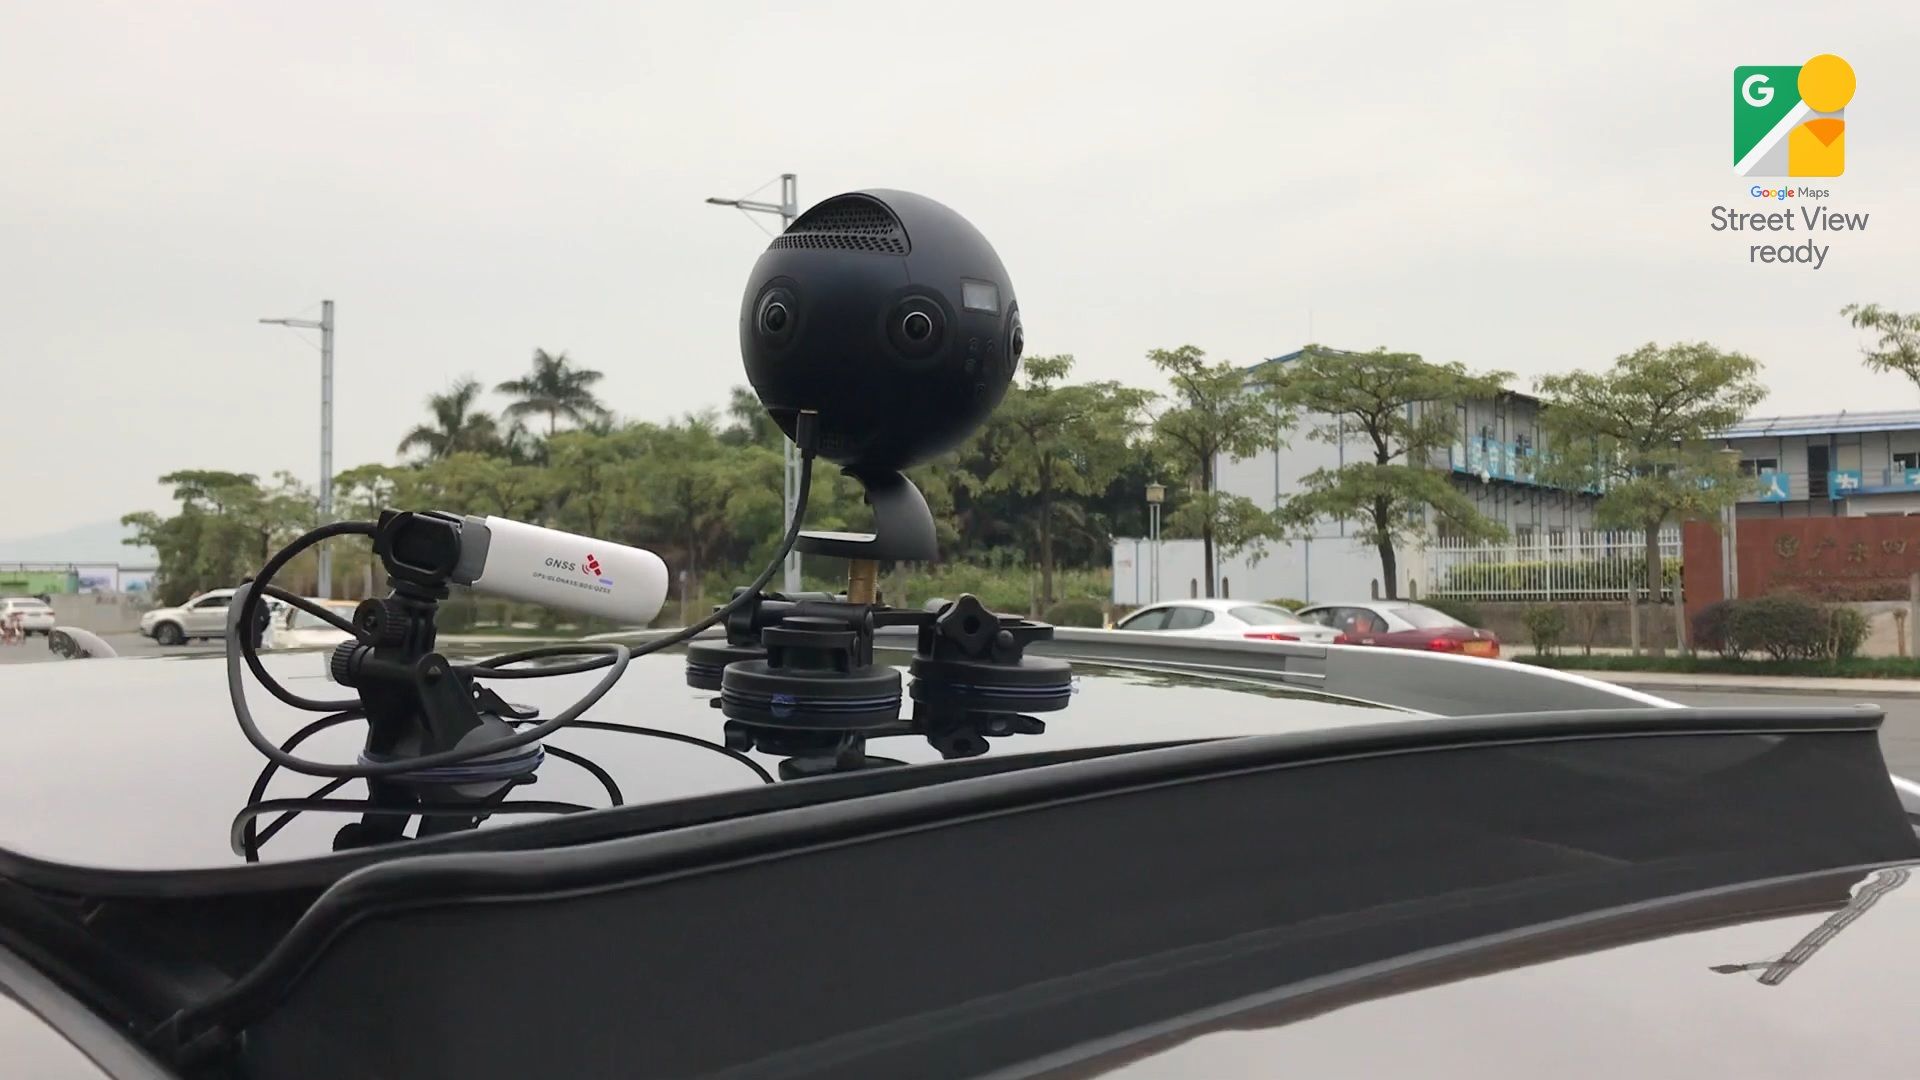
Professional Version: Insta360 Pro ($4000, 6 x 8k lenses)
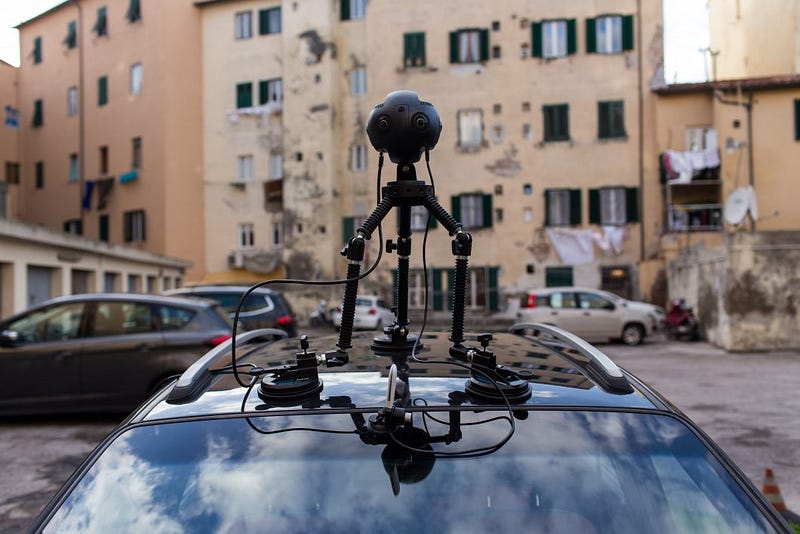
Photo credit: http://blog.insta360.com/google-street-view-federico-debetto/
It’s the size of a baby’s head. It’s black. It looks cool. It has 6 lenses. It does live virtual reality view. It streams shit. The Street View package has a GPS receiver.
Try using this at 70mph on a dust road in the middle of a deserted Bahamian island. Looks don’t count for much, nor does 8k.
The Insta360’s Street View capability is a bit of a hack, to say the least, and plagued with problems (https://forum.insta360.com/category/4/tell-us-your-problems). After a firmware upgrade (v200 or above), you have to use “5fps@8k” mode with their chosen USB GPS (GNSS) receiver plugged in. There’s no real feedback other than a “GPS” icon in the app, and no way to view or debug the data. You have to drive less than 37mph to avoid motion blur, apparently. At 5fps, travelling 30mph, that’s a frame every 6ft — roughly.
Each video is created in a separate folder on a VC10 SD card with recordings from each of the 6 camera lenses — origin_0.mp4, origin_1.mp4, and so on. The GPS data (NMEA message log) is solely recorded into a unique MP4 metadata stream (Camera Motion Metadata Specification, or CAMM: https://developers.google.com/streetview/publish/camm-spec) in origin_0.mp4. There’s no telling what data is in the MPEG transport stream: it can be extracted with FFMPEG as a .ts file, for examination.
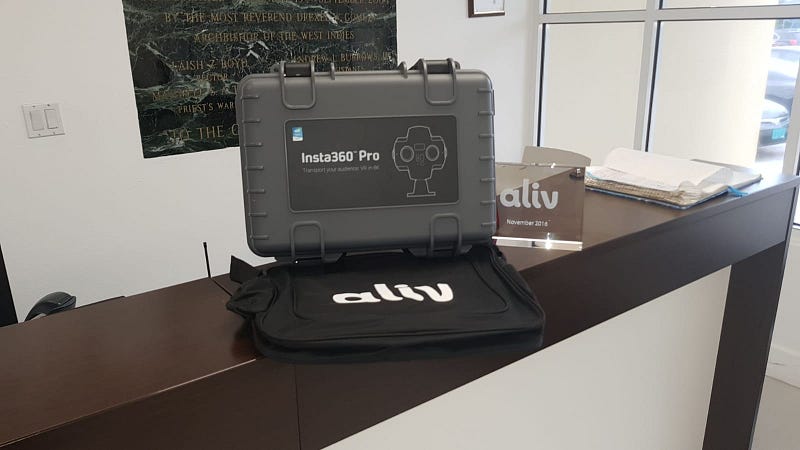
One small problem: it doesn’t come with a way to stick it on the car. You can use the magnetic suction unit they recommend, but frankly, it’s crap.
After 6 weeks waiting for it to arrive, it’s a bit of a let-down. 40% of the shot is what’s below, and a child could throw it around. As strong as the magnets are, it’s not going to take 50mph on a road with potholes every 80 metres.
When you’re driving through a town beset with endemic poverty, the camera is worth more than people make in a year. It’s also so obvious that discretion is just out the window, and so sensitive that a speed-bump or power cable render your eight-week wait at customs a catastrophic incident in future if it has to be repeated.
Break just one lens, and you’re done. With a 40min battery life, you’re cycling 5 batteries for a day’s filming.
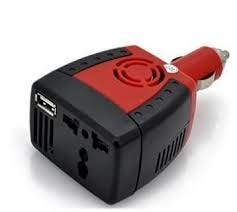
You can get around that by using a power inverter which connects to the cigarette lighter. You’ve even got a charger for your phone built in. It’s not going to work on a 2hr beach shoot.
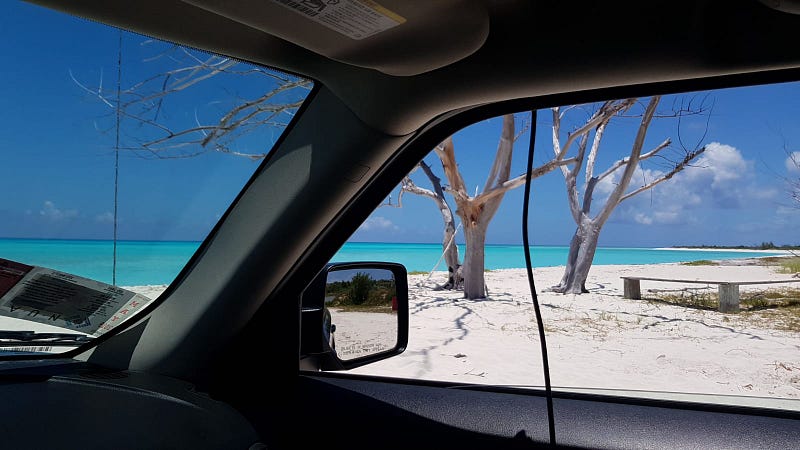
But that’s not the only problem. If you’re on a static shoot (e.g. taking pics of the beach every 10ft or different rooms in a resort), you have a very serious issue with camera control: the high-bandwidth video feed means the signal distance of the phone control app is around 15ft, whereas the optical flow distance (the depth of what you can see in the photo, http://blog.insta360.com/what-is-optical-flow/) is around 30ft.

What that means is to control the camera, you have to be within 15ft of it to press start/stop, whereas it can see double the depth. Unless you have an obstacle to hide behind, or natural landscape to conceal a wire (e.g. the sand of a beach), the photographer is in the shot.
Put simply, the Insta360 Pro is what you use for static shoots when you’re charging resorts to create an internal virtual tour on Street View using something like https://gothru.co/ or https://www.3dvista.com/.
You don’t use it for the Third World.
For that you need…
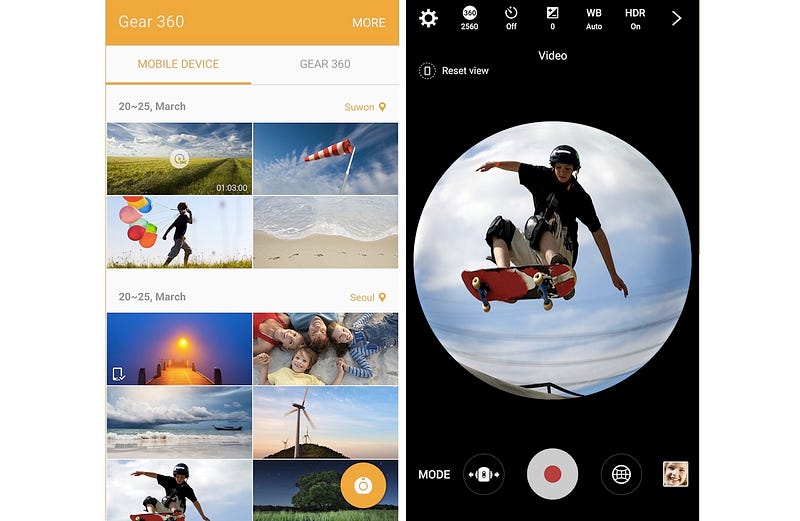
The cheap, versatile option: Samsung Gear 360 ($100, 2 x 2k lenses)
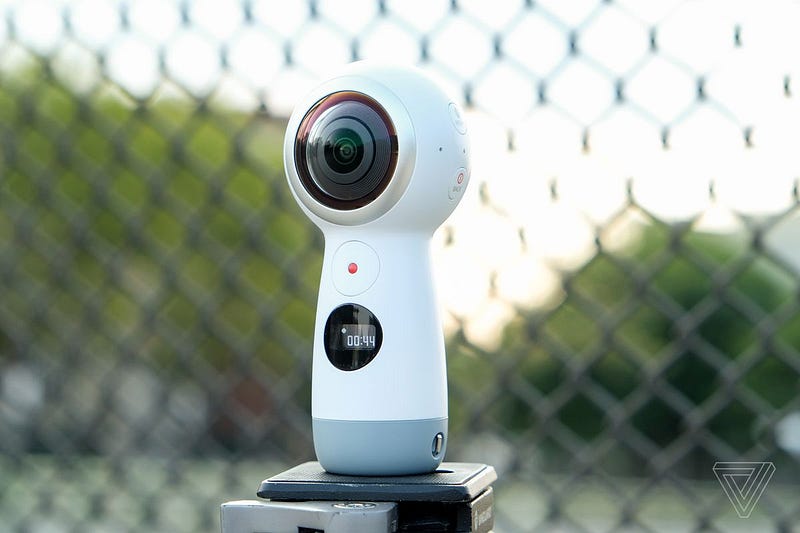
Don’t make perfect the enemy of the good.
When you’re in a third world country and a breakage means weeks of delay, you make do with what you have. A $70 camera you can get from Florida is not the same as a $4000 camera you need to order from Asia. You can get 10 of them if you need to. If one breaks or goes missing, the project doesn’t stop.
For that, you pay a price:
- It looks like a “Space Dildo” (as Rob put it)
- It doesn’t record GPS information (apart from static photos when connected to the Street View app from the phone’s geolocation)
- It only does 4k (2k if you render using the camera to your phone).
- It only has 2 lenses, with fixed focal length.
- It’s Android vs iPhone compatibility is ghastly, and Street View mode is even worse.
- It has a horrific auto-focus that creates “halos” when one gets more light than the other.
Street View is, again, a hack — and requires a firmware upgrade. It’s designed for photographers taking individual photos, and not Street View Auto-Ready. Without an intervalometer, you’re looking at an 8-second delay from the Google app as it renders an HDR image, then uploads to the API. Totally useless for the road.
Time Lapse on the Space Dildo, GPS On The Phone
Which is when we read the frustrations on the Insta360 forum, where users had given up on the 5fps mode, and just used time lapse instead.
Hmm. Time lapse. It’s not an intervalometer, but it’s better than every 8 seconds in the Street View app. Ideally, we would need 5–10 frames a second.
Time-lapse is oddly suited to the problem. At a rate of 1 photo very 0.5 seconds, the Gear 360 reliably produces a reasonable-quality photo every second (it should be twice that. but doesn’t work that way in practice). 1 minute is composed of 60 individual frames, which compress down in the eventual render to 6 seconds, at 10 fps. An hour recording roughly bites down to around 6 minutes of time lapse, or 600 4K images.
However, at 30mph, that’s a frame every 45+ feet. It’s not to the Google specifications of 10–15ft or less, but when it comes to the rough draft of seeing the landscape, the optical illusion is enough when it comes to speed and volume. You can pin a 360 image on the map, and link it to another one; wherever you are, there will be a nearby image within 30–50ft you can zoom in on. That’s good enough.
There’s one serious flaw in the plan, which the smarter types will immediately realise:
If you break down the frames later, there’s no way of telling when or where they were taken (i.e. the exported frames have no geotagging). There’s no link between the eventual frame JPEG, and the GPS coordinates. Moreover, at second-by-second, phone controllers aren’t sync’d, your mobile app may record in your timezone offset with daylight savings time (as opposed to plain UTC), and just a 2-sec difference could produce an inaccuracy of 100+ ft on the map.
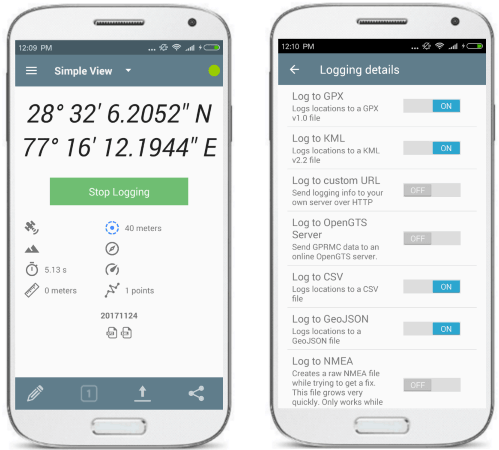
Solution: record your GPS activity as a reference data timeline set to UTC. We used GPS Logger (https://gpslogger.app/), which can be set to a sensitivity of roughly 1 reading / second, dependent on whether there is a clear view to the sky, battery power, and you don’t mind the 16ft inaccuracy of non-military receivers. Leave it running all day, and at the end, just upload it in your chosen formats (GeoJSON, CSV, KML, GPX etc), to your chosen endpoints (Google Drive, Dropbox etc).
The theory is that the creation datetime of a time-lapse frame can be roughly mapped and/or synchronised to the datetime of a parallel GPS reading, then written into its EXIF data — providing a means to geo-tag an image. It turns out, it works well.
The UTC/Zulu time the “stop” button was pressed on the Samsung Gear 360 is encoded into the file metadata using the “creation_time” tag, along with the latitude/longitude. This, again, provides a useful reference point, but it’s not to be trusted, or as good as a starting point.
Mathematically-speaking, you can take the number of frames in the resulting video, and subtract them as seconds from the “creation_time” value, to surmise the start time of the video to sync in Geosetter.
NB: This doesn’t work if your SD card is set to FAT32, which has a max file size of 1.82GB (roughly an hour). If your video is recording for 4hrs, you will have 4 x MP4 files with an indiscernible start time.
Sadly, manual verification is always going to be needed, and it’s not going to be exact. More on that specific form of hell later.
Volunteer Required, Must Enjoy Being Stared At
With all that done, all you need is an idiot to volunteer to drive around 10–20 deserted Caribbean islands with a tripod through the roof of a rental car for days at a time. And a few idiot friends passionate about the same idea to join him on the journey(s).
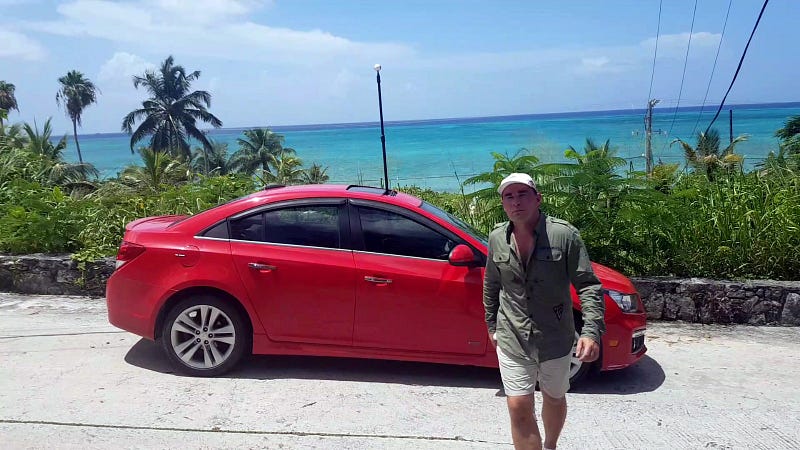
That would be moi. And on occasion, Rob Albury (aka “the Big Viking Bitch”).
Well, you need a visionary British CEO of a fast-moving telecoms company to sponsor said British idiot to drive around those islands and pick up the bill.
You have to prioritize, because you can’t film everything. There’s not enough time, spare tires, or manpower. So it’s the arteries, major roads, and key landmarks (from each direction, at least twice).
The technology, at that point, was the easy part. Among the insane things we had to deal with:
- Low-hanging power lines (which, had we hit, with a metal tripod extended 10ft above the roof of a metal car, would have BBQ’d us like KFC);
- Yellow “arterial” roads on Maps which turned out to be flooded dirt tracks covered by foliage;
- Herds of goats and sheep on random 90-degree corners;
- Unpredictable thunderstorm weather, flooding, and airline cancellations;
- Malicious tailgating and route-blocking;
- Relentless internal colleague “crab syndrome” sabotage, declined credit cards, and inexplicable corporate incompetence;
- Malfunctioning cameras, batteries, wiring, and failed metal rigging;
- Overheating, melting camera grip, causing multi-degree picture tilt;
- Randomly-placed highway speed-bumps, with no warning signs;
- Aggressive locals attempting to steal the camera rig, in motion;
- Under-serviced, over-heating, exploding rental vehicles;
- Suffocating urban traffic moving at < 5mph;
- Locals openly defecating on the roadside, in full camera view;
Final log: 5.5 weeks, 160,000+ images, 80GB footage, 1800km driven, at least 3 goats dead.
Post-Production: Strap In, We’ll Be Here For a While
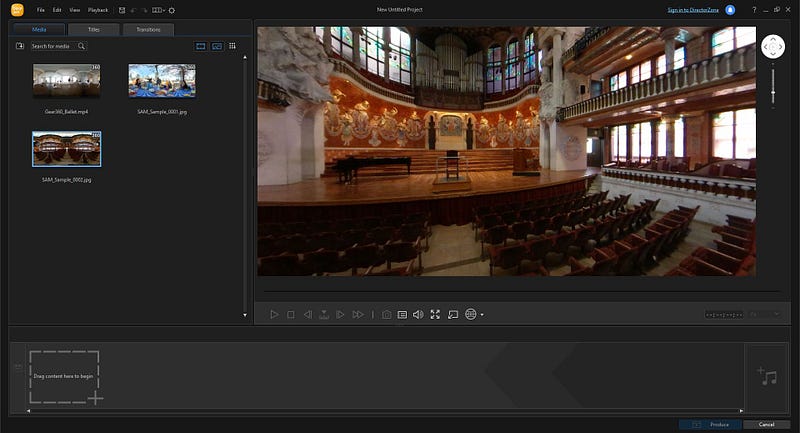
The dual lens image is stitched by dragging/dropping the file into Cyberlink Action Director (only 2k resolution available in the device). Yes, you read that right. You don’t need to press anything, the material is stitched just by dragging it into the window.
Then, it’s trivial to extract the individual frames with FFMPEG:ffmpeg -i INPUT_Stitch_XHC.MP4 -vf scale=4096:2048 -q:v 1 -start_number 1528126324 subfolder\%01d.jpg
What this command says is “extract each frame of the time lapse video to a separate JPEG file in subfolder at the best quality (1), and start the filename counter at 1528126324” (counter being the UNIX epoch, TIMESTAMP, or seconds since 1970).
But that’s just 3000 blank images. Each one needs its exact creation time to the second, and its coordinates on the map. Why? Because Google needs to pinpoint the panorama. We need to check it against the GPS log in order to discern where the coordinates of where it was taken. It’s effectively a guess, but within 30–70ft is good as we’re going to get by without a Google Car.
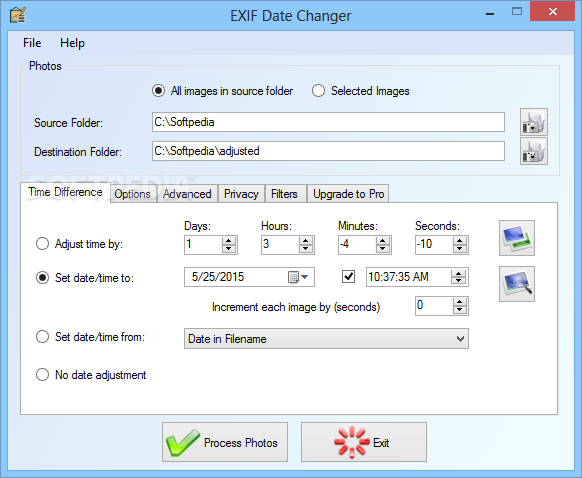
For that, we need the start time of the video, so we can add 1 second per image to its timestamp (each frame is 1 second, roughly). We can a) record the exact time the “start” key was pressed, in UTC/Zulu, and/or b) extrapolate it by taking the “creation_time” tag, then subtracting the total number of frames, as seconds.
Enter Exif Date Changer (https://www.relliksoftware.com/exifdatechanger/). If we know the start time of the first frame to the second, we can use its “increment each file by 1 second” option to batch-update our thousands of image files. To validate it, we can use the “creation_time” trick to get a rough start time, coupled with our manual notes.
We’re left with 3000 timestamped images, and a massive GPS log stored as GeoJSON and GPX.
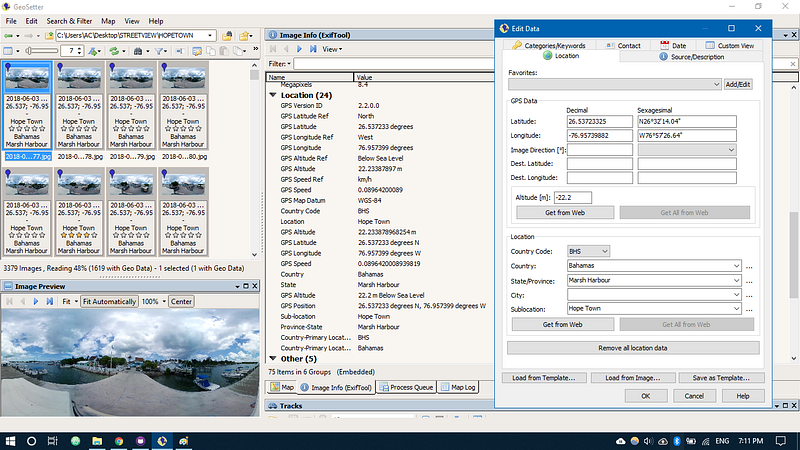
And this is where GeoSetter (https://www.geosetter.de/en/main-en/) sneaks in as our secret weapon. This bad boy can take your GPX track files (which you’ve uploaded to Dropbox from GPS Logger), and your timestamped images (from FFMPEG/Exif Date Changer), and sync them together via the file meta data — creating a lovely panoply of the same kind of EXIF info the Gear 360 and/or Street View app could itself include with static 360 images. It’s not perfect, but hey, we’re trying here to not make an enemy of the good.
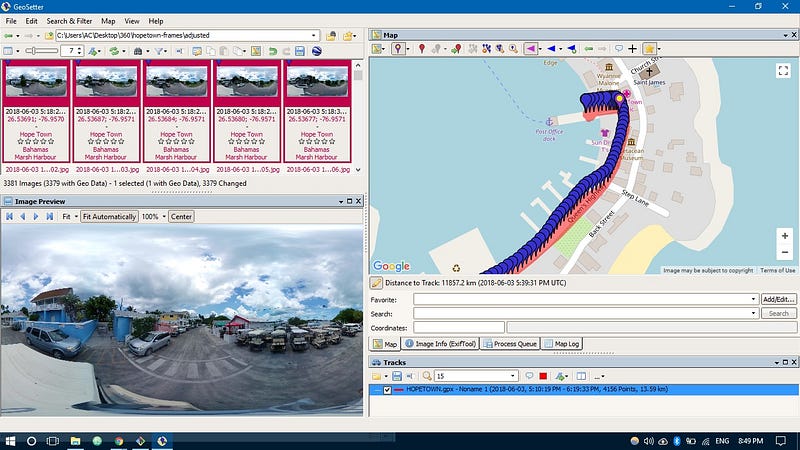
There’s another catch, of course: it can take hours to write the new file data to disk (hint: you need an SSD, and turn off auto location lookup via GeoNames), and it requires detailed manual checking that the images are correctly synced against their landmark positions on the map. Is the photo on that road bend actually taken there, or is it 2 seconds behind? Back to the date-setter you go. Each image is a second, so you have to check the first 300 against every turn in the road to ensure it has the desired accuracy.
Important: Adding XMP Metadata
Geosetter was last updated in 2011, and doesn’t include the ability to view 360 panoramas natively, or to add XMP data. For a photo viewer or website to recognise your image as panoramic, you need to add a set of additional XMP EXIF tags to the file via ExifTool. In Settings > ExifTool > Additional ExifTool Commands After:-execute -FullPanoWidthPixels=4096 -FullPanoHeightPixels=2048 -CroppedAreaLeftPixels=0 -CroppedAreaTopPixels=0 -CroppedAreaImageWidthPixels=4096 -CroppedAreaImageHeightPixels=2048 -ProjectionType=equirectangular -usePanoramaViewer=true -"PoseHeadingDegrees<GPSImgDirection"
All of this could be avoided, of course, if Samsung just recorded the app’s GPS location into each frame, or a log.
A few hours later, and you have your 3000 geo-tagged 360 images. It should be easy, but it’s where things get complex. If you’re a Street View Trusted photographer, you’re probably not submitting more than 50 photos a day. If you’re a Bahamian Street View maniac, you could be easily producing 10,000 a day.
If something goes wrong with your day’s shoot — such as a 1-degree camera tilt — you’re going to need to fix it. After you’ve stopped screaming.
For that, you can use Hugin (http://hugin.sourceforge.net/), which is just one of those pieces of software people give a nice “wow” to anytime they see you using it. Incidentally, it’s a useful learning resource to understand 3D “spherical” imagery in a visual way.
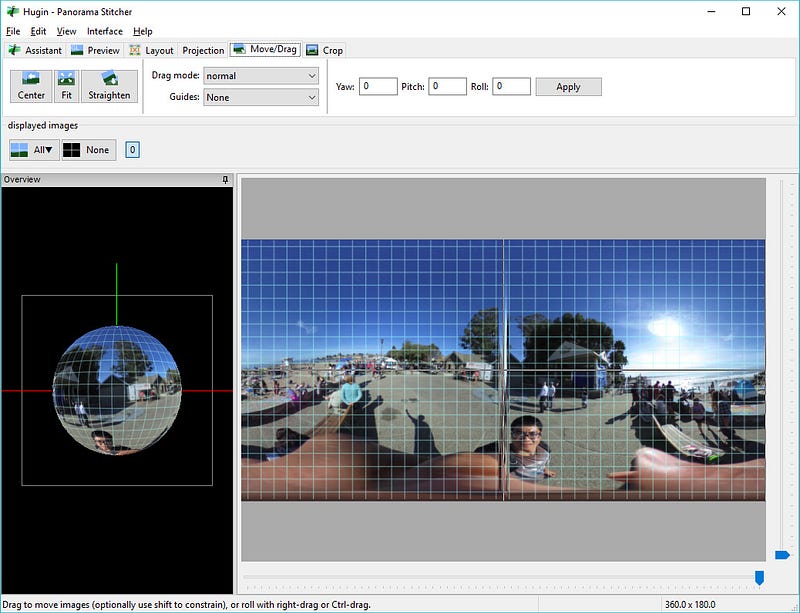
The “batch” mode of this extraordinary open-source of software is a life-saver. Using it is beyond the scope discussed here, but these guys need an award).
Bulk Uploading & Breaking Both The Street View Publish App & API
The Street View app obviously isn’t meant to deal with this kind of volume. It’s designed for photographers to upload 1–50 images they’ve carefully selected to be linked to a pre-existing Maps location: images need to be connected to an existing placemark on Google Maps (i.e. the app doesn’t get the lat/lng from the EXIF GPS data for any spot on Earth, but rather the Google Maps-defined “Place” from their search index you select).
Again, frankly, it’s OK, but if you’re serious about industrial 360 production, it’s crap.
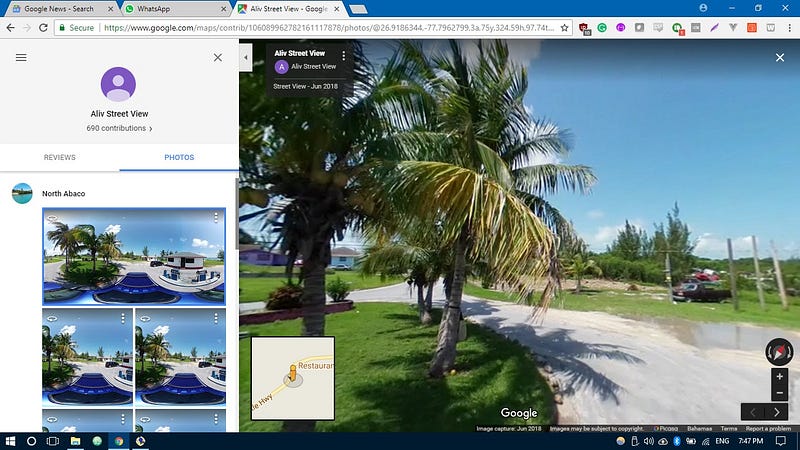
1500+ images kills the app outright even on a phone with reasonable memory, so you need to work with the nascent Street View Publish API(https://developers.google.com/streetview/publish/), for which we had to write a custom library (https://github.com/azcoppen/streetview-publish), as well as request a higher limit than 4000 requests a day (no reply though, thanks Google). Stats take at least 2–3 days to update, but the satisfying feeling of seeing the “approved maps photos” count is well worth it.
Uploading to the Streetview Publish API is straightforward, but annoying:
- Request a new upload URL;
- Upload photo file data (as bytes);
- Upload linked XMP data (as JSON);
- Record subsequent object data (returned as JSON).
Which would be immediately easy if you could use an API key for multiple requests, but for reasons known only to themselves, Google have designated it an OAuth2 flow with refresh and access tokens, designed mainly to be grant permission via a browser UI. With 50,000 images going up via a CLI app, grabbing a new access token is just a PITA. Yes, you have CLI options, but the nightmare of dealing with it makes OAuth the least worst variant.
All that is fine with a few thousand images, but when you’re producing over 100,000, you could easily end up submitting duplicates. So you need to record while files you’ve uploaded.
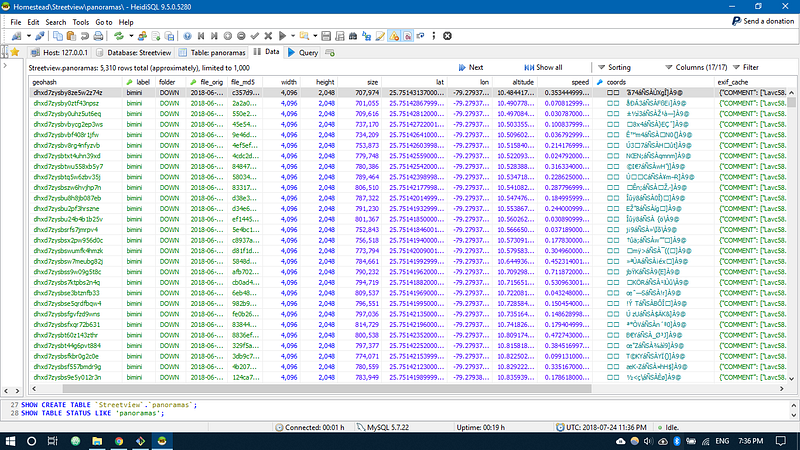
More Cowbell: Let’s Index It All In MySQL/PostGIS
Hence the final step: logging your submissions in a geospatially-searchable database against their filename, MD5 checksum, and geographic coordinates.
The only place we have the geotagged positioning is the EXIF data in the file, which is logged as GPSLatitude, GPSLatitude, GPSAltitude etc in canonical format (not decimal). AWS, Google Drive, and Cloudinary don’t really have the smarts to search your catalogue spatially (as far as i know).
Trusty MySQL is reasonable for this kind of archive, as is Postgres, Spatialite, or MongoDB.
You could give each image its UUID by storing each lat/lon coordinate pair as a Geohash (https://dev.mysql.com/doc/refman/8.0/en/spatial-geohash-functions.html) or a Plus Code (https://en.wikipedia.org/wiki/Open_Location_Code).
If you have the latitude/longitude from EXIF geo-data stored in a POINT column, you can start to run geometric queries on image collection to find the “nearest” image to a GPS position, or a group of images in a polygon shape, along with its Street View published ID (or Mapillary data).
Assuming we have geo column “coords” for each image record:SELECT *, ST_DISTANCE (coords, POINT (lon, lat)) as distance
FROM images
WHERE ST_DISTANCE (coords, POINT (lon, lat)) < (MAP_DEGREES * MPH/KM MULTIPLIER)
ORDER BY distance ASC
LIMIT 0, 20;
MySQL’s spatial functions aren’t great (distance functions are in map degrees rather than units such as miles/km, and don’t correspond with GMaps etc). Postgis is a little more specific. To optimise queries, it’s important to draw the bounding box around a possible query area, instead of searching from 180 to -180. Overall, it’s yet again a case of trial and error, and/or not making perfect the enemy of the good: is it near enough?
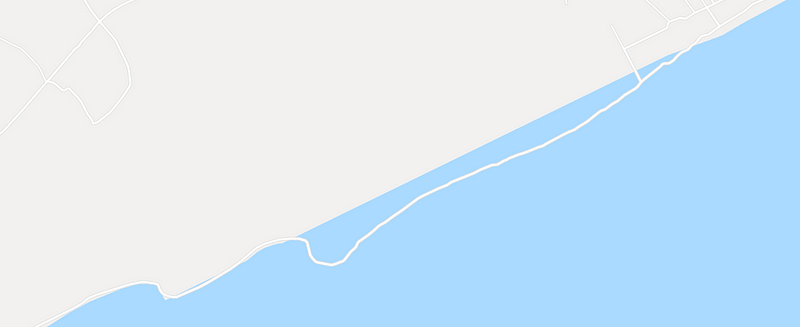
If all else fails, blame it on Google (or Canada). There are roads in Maps plotted in Grand Bahama that go 11 miles through the sea (underwater presumably guys?). We were 150% certain we were on the road with the right GPS coordinates, but still, on the map, we’re apparently 10 metres east of, you know, where we were.
Advanced Cowbell: Spatial Searching 360 Imagery with Elasticsearch
If you need true “searchability”, you’re heading to a specialist search engine platform. The full badassness of Elastic is beyond the scope here, but let’s just say, if you want to impress the girls, maybe, erm, don’t do this, and do something else.
Elastic allows you to issue geo-queries across indexed data, not just text. So let’s say you have sync’d your Postgis models with an Elastic index somewhere (e.g. localhost, AWS etc) with something like Laravel Scout (e.g. https://github.com/babenkoivan/scout-elasticsearch-driver).
Just define your mapping, as usual (https://www.elastic.co/guide/en/elasticsearch/reference/current/geo-point.html):PUT streetview_index/_doc/1
{
"text": "Bahamian screaming at the car next to Rubis gas station",
"location": {
"lat": 41.12,
"lon": -71.34
}
}
And to query it — while simultaneously making all the other techies feel very small because of your over-engineered madness:Streetview.search(
"*",
filter: {
must: [
{ term: { hazard: "potholes" }},
{ term: { island: "san salvador" }}
]
},
sort: {
_geo_distance: {
location: "#{lat},#{lon}",
order: "asc",
unit: "mi"
}
},
size: 20
)
OK, enough of that.
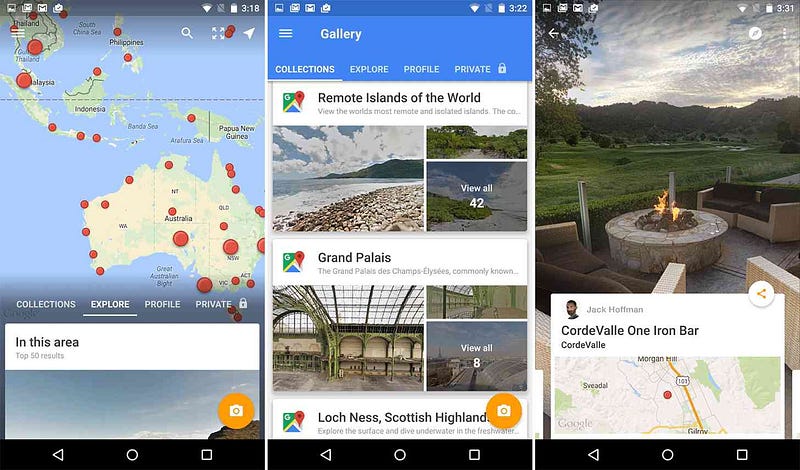
Showing Off To Grandparents: Dynamic Display in 360 Viewer UIs
Browsing 360 photos is simple on a modern computer. For example, Windows 10 has a “360 mode” for its photos/film application you can switch to: https://www.windowscentral.com/video-360-app-windows-10-now-supports-360-degree-photos-well .
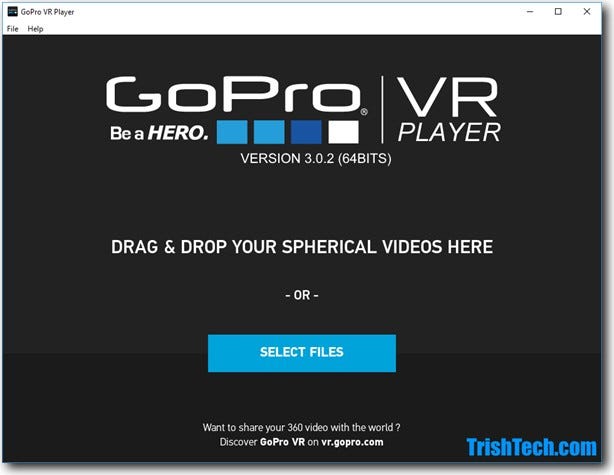
Any VR player will be able to load and display properly-encoded spherical images (geographic applications will need the XMP data).
For a reliable standalone/offline way of viewing them on anyone’s machine, there’s the free GoPro VR player: http://www.kolor.com/gopro-vr-player/download/ .
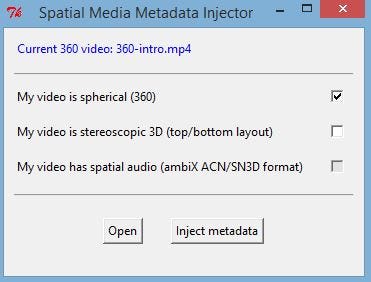
Uploading to YouTube “kinda” works natively, supposedly — but you’ll need the Spherical Metadata Injector (what a catchy name, guys: https://support.google.com/youtube/answer/6178631?hl=en) applied to the MP4 file first.
NB: Stitched Samsung Gear 360 video files don’t work with the YouTube SMI tool. You have to, for some maddening reason, use the “produce” section of the app to add the XMP data — which re-compresses footage. Samsung, you suck.
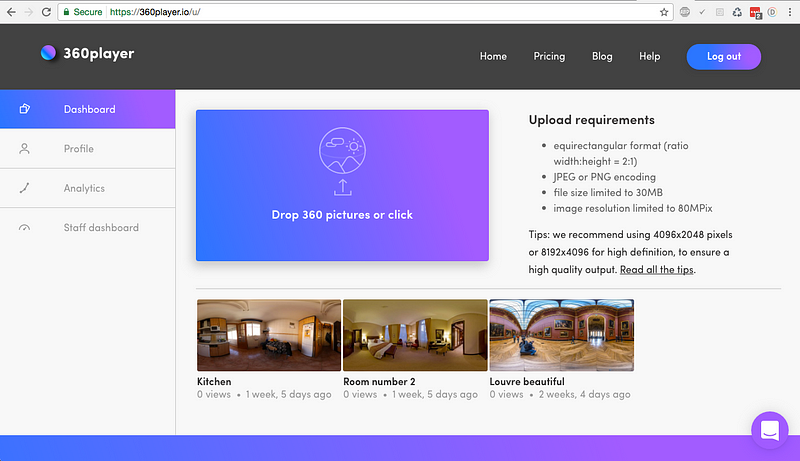
We were HUGE fans of a smaller, free platform for image hosting/embedding in normal web pages: 360player.io (https://360player.io).
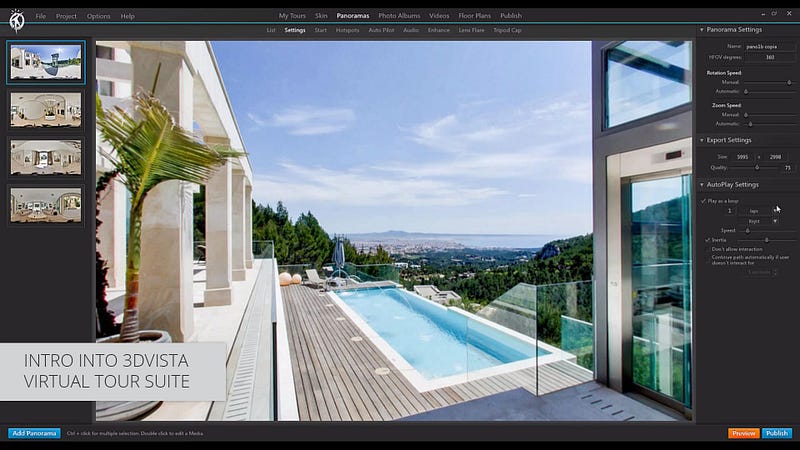
If you’re just doing a virtual tour with a floor plan, the quickest and simplest route is to buy a desktop GUI package. We used 3DVista (https://www.3dvista.com/) in the earlier days (and ahem, “borrowed” their JS output).
But, for the hardcore, you’re going to want to publish your own DIY front-end using Javascript — as we did.
The “grandfather” of spherical display is KRPano (https://krpano.com/).
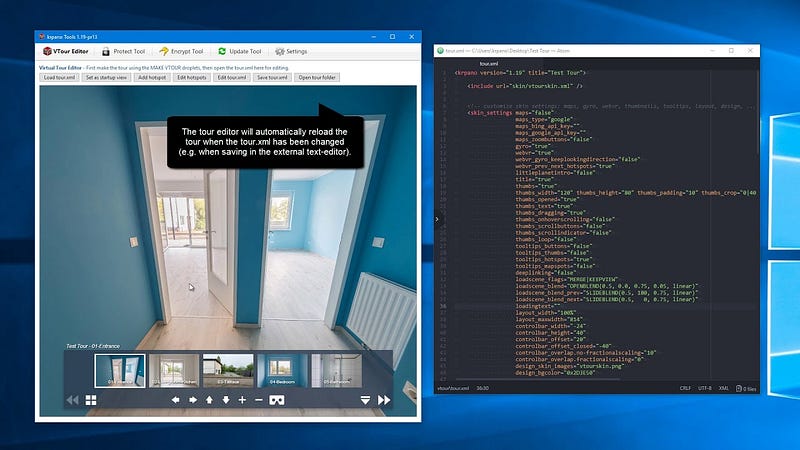
It’s not exactly user-friendly, if we’re brutally honest. If you’re a Hugin user, it’ll be familiar.
Thankfully, we’ve all now got a few more options, mostly based on Three.js (from https://veer.tv/blog/top-13-panorama360-degree-photo-viewers/):
- Photo Sphere Viewer : https://photo-sphere-viewer.js.org/
- Pannellum : https://pannellum.org/
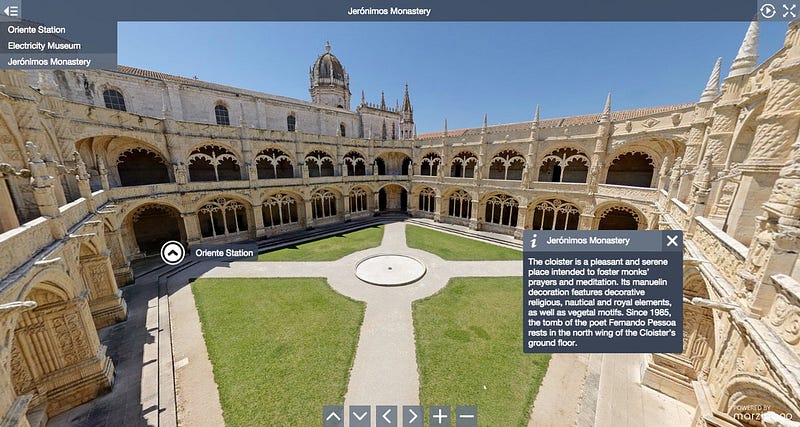
- Marzipano : http://www.marzipano.net/
Although first on track with Pannellum, it just gets annoying with all its client-side rendering of photo tiles. Not with 100,000+ images, guys. So the choice was Marzipano, via CDN.
Displaying a single equirectangular image is hilariously simple:'use strict';// Create viewer.
var viewer = new Marzipano.Viewer(document.getElementById('pano'));// Create source.
var source = Marzipano.ImageUrlSource.fromString(
"//www.marzipano.net/media/equirect/angra.jpg"
);// Create geometry.
var geometry = new Marzipano.EquirectGeometry([{ width: 4000 }]);// Create view.
var limiter = Marzipano.RectilinearView.limit.traditional(1024, 100*Math.PI/180);
var view = new Marzipano.RectilinearView({ yaw: Math.PI }, limiter);// Create scene.
var scene = viewer.createScene({
source: source,
geometry: geometry,
view: view,
pinFirstLevel: true
});// Display scene.
scene.switchTo();
And that is how you create a Street View search engine, if you’re lucky enough to work with a company like Cstraight (cstraight.com), who appreciate your mad scientist urges. Moreover, when you have the technical and spiritual guidance of the one and only, — the man, the British legend — , Henry St George.
So, What Did We Learn?
Many things. Amongst them, Rob goes a little insane after 2hrs or so, particularly when he’s hungry.
- Do not let politicians (or their lackeys) get involved with projects, or try to take credit for them — i’m talking to you, G***, you corrupt, useless, and malevolent idiots.
- Don’t make perfect the enemy of good.
- Simple and effective is better than sophisticated.
- Don’t drive into a US Naval Warfare base, even if the soldiers are really cool about it.
- You can find a way, even when all looks apocalyptically bleak.
- Buy 5 of everything.
- An island takes roughly 3 days to film (100 miles a day over 4–5 hours).
- The optimal height of the camera is approximately 7–10ft above the vehicle, for spherical viewing at a slight zoom level. A lorry/truck is about 14ft, which is where power cables are generally (cough, Abaco, cough) pulled up to. If in doubt, go with about 6ft-ish above the car.
- Do not expect anyone to have any idea what you’re doing, or what Street View is (ahem, “why have you got a magic spear sticking out of that mechanical horse?”)
- Driving at 35mph for 4 hours is incredibly boring without Spotify.
- Don’t ever expect anything in the Caribbean to work, ever. And don’t ever fly Bahamian regional airlines, if arriving punctually, or surviving the journey, is part of your plan.
- Duct tape fixes everything. But it loosens in the sun.
- Resolution is lost in spherical view. Start with the highest you can get (8–32k). Conversely, 2k is fine for laypeople to find useful.
- 1 degree of tripod-tilt/roll over 2hrs at 50mph ruins a whole day.
- 10–15mph in a golf cart is about right for a 1-second timelapse to generate Street View auto-ready compatible photos.
- 25mph in populated settlements, up to 50mph on longer roads.
- Street View is a bit like “painting” in the “detail” of minor roads once you’ve gone backwards and forwards over the main arterial ones a few times.
Places We Stayed, Who Put Up With Us
Traveling the Bahamas on a budget is a near impossibility. But we did it, thanks to Aliv.
- New Providence: Orange Hill Beach Inn, Nassau (https://orangehill.com/)
- Abaco: Abaco Beach Resort, Marsh Harbour (https://abacobeachresort.com/)
- Grand Bahama: Pelican Bay Hotel, Lucaya (https://www.pelicanbayhotel.com/)
- Eleuthera : Squires Estates, Governor’s Harbour (https://www.squiresestate.com/)
- Andros : Rolle’s Cabanas, Fresh Creek (https://www.homeaway.co.uk/p931922vb)
- Bimini : Big John’s, Alice Town (https://www.instagram.com/biminibigjohns)
- Exuma : Peace and Plenty, George Town (https://www.peaceandplenty.com/)
- Cat Island : Greenwood Beach Resort, Port Howe (https://www.greenwoodbeachresort.biz/)
- Long Island : Winter Haven Inn, Clarence Town (http://www.winterhavenbahamas.com/)
- San Salvador : Sands Resort, Cockburn Town (https://www.booking.com/hotel/bs/the-sands.html)
- Providenciales : Paradise Inn, Grace Bay (http://caribbeanparadiseinn.com/)
The Bahamas is a jaw-droppingly beautiful archipelago. It’s also staggeringly overpriced *, for the worst quality you can imagine. Price-gouging hoteliers charge exorbitant rates for appalling Third-World accommodation, citing the difficulties of importing goods onto islands (in the age of ubiquitous air travel and e-commerce). The food is dreadful at Michelin prices, and the customer service even worse — many places don’t “trust” the “modern” technology of credit cards, and openly scorning visitor requests. There is very little, if any, public transit , or foreign operators like Uber— leaving only insanely over-priced taxis ($15 for 0.5 miles from LPIA).
If you do plan to visit, AirBnb and car rental are the way to go.
- For gentrification, forget it, and go to Grace Bay (Turks & Caicos). If you have to, go to Abaco.
- For marine wildlife, go to San Salvador Island.
- For sailing, the Exuma cays are the most sci-fi beauty on Planet Earth.
Otherwise, cancel your itinerary, and head directly to Cat Island, or Long Island. These two are by far the sleepiest and most beautiful of all. If you have a hotel booked in Nassau, unbook it, walk across the terminal, and take a flight to New Bight or Arthurs Town. Long Island is particularly interesting for its diverse geography (e.g. Dean’s Blue Hole, the Cape etc), and Cat Island is simply an untouched jewel which feels like a desert island from 1750. If you can’t choose, go with Cat.
The money you waste on a hotel in Nassau (e.g. Baha Mar, Atlantis, Hilton etc) will burn a bitter “rip-off” taste into your mouth, and the less said about Freeport, Bimini, and Great Exuma, the better. Eleuthera has an exceedingly strange rip-off scheme with rental cars (Harbour Island is far past its prime, and the sand isn’t actually pink).
If you’re wondering why Crooked, Acklins, Ragged, Rum Cay, Mayaguana, and Inagua aren’t on the list, it’s simple: there’s no way to rent a vehicle, the roads are barely passable, and nobody goes there. Aliv have said they want to cover them regardless, but it won’t be for a while.
** The reason for this over-pricing, despite the country being less than 45mins from the US, is the protectionist policy of successive governments, which prohibit any competition from any external market — similar to a national welfare program. That, and simple price-gouging. The food, supplied by Bahamas Food Services, to everyone, is appalling. BahamasAir has 6 serviceable planes, $120M of debt, yet also has 800+ employees.
Where To Next, Captain?
There’s a lot you can do with this extraordinary technology, and to use virtualisation for amazing good. True 3D doesn’t just have width and height, it has depth, which is the next frontier, so to speak.
All of the Caribbean islands, and Latin America, need to be filmed.
But underwater, of course.
- The Boxfish 360: http://www.boxfish-research.com/360 (or just use a housing for the Gear 360) can produce 5k videos of coral reefs.
- The iBubble is an autonomous underwater drone which can track reefs and large fish: https://ibubble.camera/
Or maybe, up there in the air to map the topology.
- Gear 360s can easily be strapped into Cessna or a Piper as the Street View car carries them (tripod upside down, under the empennage).
- Precision Hawk’s drones can survey a landscape from above via LIDAR: https://www.precisionhawk.com/precisionmapper
- Autel Robotics’ X-Star drone can reportedly record 360 video at a range of 2 miles.
So, let’s extrapolate that slightly, for, say, an island in the Caribbean which was hit badly by a hurricane.
If we were to take 360 imagery of the surface and coastal areas, we could combine that with the aerial view and topology, to create a sophisticated 3D VR model. Not only would it be indispensable for recovery efforts, but it would give us a means to run thousands of complex, iterated simulations across it to determine optimal scenarios: constructing flood defences, terra-forming soil, and so on. We can build a photo-realistic world before it existed, for a 10,000th of the actual cost of doing it.
But that will, hopefully, be another project.
** If you’re curious why it’s called the West Palm Martini, it’s because our friend Jaimee — who works in a strip club — had to fly over Samsung 360 cameras and SD cards from Best Buy in her make-up bag from West Palm Beach, FL after the Insta360 broke. In filmmaking, the Martini is the last shot you capture. She also randomly commented “why don’t you just use a sunroof?”


